


One good screenshot is worth a thousand words. Whether you want to quickly capture a sample of your work, send a reference visual, highlight a mistake or inconsistency, taking a screenshot is essential for efficient work.
You can opt to capture your screen or a portion of it with macOS built-in tools or you can explore screenshotting options that offer additional tools like creating a GIF, making a scrolling capture, or editing out sections of your screenshot for privacy.
If you want a screenshotting tool that offers that and more, CleanShot X is our choice. The app allows you to capture your screen in a variety of ways fit for most purposes — scrolling screenshot to capture those long presentations or web pages, easy GIF creation if you need to make an illustration for your landing page, product demo, or a blog post, and our favorite blurring feature to edit out personal information from screenshots.

Best screen recording tool
With CleanShot X, you can capture the entire chat history, a report, or any scrollable content from websites or apps.
Try freeAnd if your desktop icons keep getting in the way of the perfect screenshots, don’t worry, CleanShot X can easily hide them. Just click the respective option in the app’s menu and you are good to go!
Now, let’s dive into how you can use these and more CleanShot X tools.
Capture your Mac’s screen like a pro
The most important part of taking a good screenshot is being versed enough in it that you can do it quickly and not missing a beat. Sometimes you just need to capture something without wasting a moment before it vanishes, so here’s how to best leverage CleanShot X for quick and/or perfect screenshots.
Setting up CleanShot X
First things first, how do you take a screenshot with CleanShot X? You can simply click the app icon in your Mac’s menu bar and pick the screenshot you want to take from there.

But that’s not always the best option if you want to take your screenshot instantly, before whatever it is that you are capturing is gone. Use keyboard shortcuts for quicker screenshot taking.
To set them up, click Settings in the CleanShot X menu bar drop-down menu and go to Shortcuts.

Here, you can record your preferred shortcuts for various screenshot types or you can choose to use system default shortcuts for your CleanShot X screenshots — just click the Use System Default Shortcuts button at the bottom of the menu.
The app will prompt you to set it as the system default screenshot tool.

Take the screenshot you need
With CleanShot X, you can take all the popular screenshot types — capturing a single window, your whole screen, an area on your screen, a scrolling capture, or a video capture.
To pick the type of screenshot you need, click the menu bar icon of the app and select the screenshot type.

Record video and GIFs
You can record a video of your screen with CleanShot X just as easily. Simply pick the Record Screen option in the menu and select the area you want to capture.
Video recording options will appear on your screen.

Decide if you want to create a video file with your screen recording or a GIF, and select the respective option.
Additionally, CleanShot X allows you to record your mic or computer audio, your webcam, show keystrokes and highlight clicks. These are wonderful tools for times when you are creating product demos, walkthroughs, or presentations. You can also choose to show recording time as you record to help you keep track of the length of your video.
And lastly, but not in the least less importantly, you can choose to set Do Not Disturb on in CleanShot video recording settings. Now unwanted notifications won’t ruin your whole recording!
Worried about video files or GIFs of your screen recording getting too large? Just set the quality restrictions in the settings.

Self-timer
If you need some time to set up your screenshot before you capture, use the self-timer option in CleanShot X.
Click on the app’s menu bar icon, select Self-Timer, and select the area you want to capture. The 5-second timer will start automatically.
Remove background distractions
We’ve all been there — your desktop is as cluttered as it can be, filled to the brim with private files or sensitive information, or just looking like a mess, and that’s exactly when you need a nice clean screenshot of something you’ve been working on.
Before you waste your time trying to clean up your desktop in a time crunch, take a beat. CleanShot X can hide your desktop icons in a click. Go to the app’s menu in your Mac’s menu bar and click Hide Desktop Icons. And voila, your desktop is pristine!
Easily access quick actions
Once you’ve captured your screenshot, you can perform quick actions with the file. Copy it to clipboard, save in your desired location, drag and drop onto your desktop to save, save to cloud storage, or make further edits — CleanShot X makes it easier than ever.
Draw on screenshots
Highlighting something in your screenshot is the action that’s probably most used when it comes to editing screenshots.
CleanShot X makes it easy to add arrows, lines, text, emoji, and even other screenshots to your screenshot.

Pick what you need from the editing panel at the top and make your screenshots more functional than ever! You can even add a counter for easy illustration.
Annotate your screenshots and hide sensitive content
With CleanShot X advanced editing tools designed specifically for screenshots, you can annotate your images, combine multiple screenshots in one explainer, and blur out sensitive information.

Add custom wallpaper
Clean up your screenshots with CleanShot X background tool. Set the scene with beautiful backgrounds and make your captures look stunning.
Pick a background while editing your screenshot — an image or a plain color — and instantly add it to your capture.

Capture text from images
There’s nothing more tedious than retyping all the text in your screenshot or PDF. Whether it’s some old image files or a screenshot you saved for later, CleanShot X can capture text from it with its handy Capture Text (OCR) tool.
Simply pick this option in the app’s drop-down menu bar menu and select the text you need captured. CleanShot X will take a second to process and then you’ll be able to simply paste your copied text where you need it!

Grab and save to the cloud
Use CleanShot Cloud to store your screenshots if you want to save some precious hard disk space. The app helps you declutter your desktop and free up valuable hard drive memory for things more important than random screenshots.
Here’s how to store your screenshots in CleanShot Cloud.
- Make your capture.
- On the overlay menu of your screen capture, click the Cloud button. You’ll be prompted to log into CleanShot Cloud, use sign in with Setapp if you are a Setapp user.
- Once your one-time cloud setup is complete, just click the cloud icon in the top right corner of your screenshot miniature overlay to save your item to cloud.
- You can adjust expiry time for your screenshot or get the sharing link on cleanshot.cloud > Your media.

Download and share screenshots from the cloud
Access CleanShot Cloud via CleanShot X menu bar menu by clicking on View All Uploads. Find all your screen captures neatly stored on the cloud. You can also copy the link to your most recent capture from the app’s menu.
From the cloud, you can download your screenshots and recordings, tag them, or get a link for sharing.

Note that the default expiry date is just 7 days. You can adjust it to 1 day, 30, 90, 365 days, or even never.
Pick destinations instantly
If you vary the location of where your screenshots are saved, this feature in CleanShot X is a must for you. Open the app’s Settings from the menu bar drop-down menu and go to Quick Access.
Find Save button behavior at the bottom of the window and set it to Ask for destination. This way, CleanShot X will give you a chance to pick your screenshot saving destination when you click the Save button on the screenshot miniature.

Screenshot with CleanShot X
Screenshots with CleanShot X can be as easy or as advanced as you want them to get. From basic capturing tools to quickly save a portion of your screen or record a screencast, to more advanced screenshot edits like blurring out sensitive information, adding a background, or creating an explainer, CleanShot X can do it all.
We hope this guide will help you make amazing screenshots and save time with this tool. Get CleanShot X on Setapp along with 240+ more apps for your daily tasks on Mac and iOS.
Not on Setapp yet? Get started with an easy 7-day free trial and try the apps, including CleanShot X now!
Das obige ist der detaillierte Inhalt vonCleanShot X Tutorial: No-Clutter Screening erfassen auf dem Mac. Für weitere Informationen folgen Sie bitte anderen verwandten Artikeln auf der PHP chinesischen Website!

 So fassen Sie Webseiten in Safari für Mac zusammenMay 09, 2025 am 10:47 AM
Safari Browsers leistungsstarke Web -Vereinfachungsfunktion: Verwenden Sie Apple Intelligence, um effizient zu lesen! Eine der integrierten Apple Intelligence-Funktionen des Safari-Browsers ist die Web-Snippet-Funktion. Unabhängig davon, ob der Inhalt einer Webseite eine langlebige oder eine normale Website ist, kann Apple Intelligence schnell eine Zusammenfassung erzeugen, wodurch Sie schnell das Verständnis von Webseiteninhalten und das Speichern von Zeit haben. Diese Funktion ist in Safari für Mac sehr bequem zu verwenden. Wie benutze ich die Web -Ssummary -Funktion in Safari für Mac? Wenn Sie einen Apple Silicon Mac mit MacOS Sequoia 15 oder später verwenden
 So beheben Sie Probleme mit Spotlight -Suchproblemen auf MacOS SequoiaMay 09, 2025 am 10:36 AM
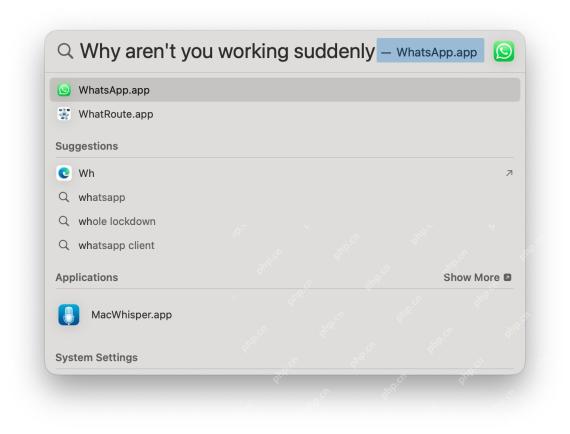
Eine angemessene Anzahl von Mac -Benutzern hat festgestellt, dass die Spotlight -Suche in MacOS -Sequoia nicht gut funktioniert, entweder fehlende Dateien, Apps und manchmal überhaupt nicht, um eine lokale Datei zu finden. Für einige Benutzer treten die Probleme mit dem Spotlight direkt nach t auf
 Wie kann ich Safari auf Mac anpassen? Wie personalisieren Sie es auf MacBook Air/Pro?May 09, 2025 am 10:35 AM
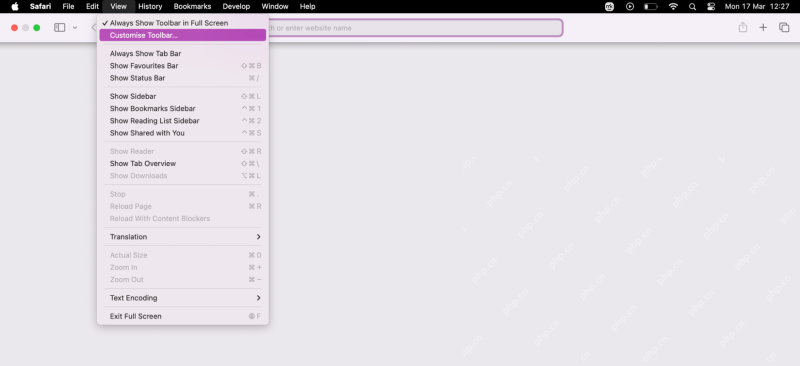
Personalisieren Sie Ihre Safari -Erfahrung auf MacBook: Ein umfassender Leitfaden Sie können Safari problemlos auf Ihrem MacBook anpassen, um Ihr Browsing -Erlebnis zu verbessern. Dieser Leitfaden bietet einen Schritt-für-Schritt-Ansatz zur Personalisierung verschiedener Aspekte von Safari aus dem t
![Wie kann man Benachrichtigungen zum iPhone zum Schweigen bringen? [Stumme Nachrichten und Apps auf iOS]](https://img.php.cn/upload/article/001/242/473/174675709271104.jpg?x-oss-process=image/resize,p_40) Wie kann man Benachrichtigungen zum iPhone zum Schweigen bringen? [Stumme Nachrichten und Apps auf iOS]May 09, 2025 am 10:18 AM
Wie kann man Benachrichtigungen zum iPhone zum Schweigen bringen? [Stumme Nachrichten und Apps auf iOS]May 09, 2025 am 10:18 AMStille iPhone -Benachrichtigungen: 6 Möglichkeiten, Ihren Frieden zu finden Benötigen Sie eine Pause von der ständigen Summe von iPhone -Benachrichtigungen? Dieser Leitfaden bietet sechs Methoden, um Ihr iPhone zum Schweigen zu bringen, von schnellen Umschaltungen bis hin zu geplanten Ruhezeiten. Lass uns eintauchen! 1. Fokusmodus: die
 So zeichnen Sie Anrufe auf dem iPhone aufMay 09, 2025 am 10:15 AM
Die neue iPhone -Anrufaufzeichnungsfunktion in iOS 18.1 und höher macht die Aufzeichnung beispiellos einfach! Tippen Sie einfach auf die Schaltfläche "Aufzeichnung" auf dem Bildschirm, um die Aufzeichnung zu starten. Diese Schaltfläche befindet sich auf dem gleichen Bildschirm wie der Lautsprecher-, Stummschalt- und Stummschalter und macht sie bequem und schnell. Nach dem Start der Aufzeichnung wird das System automatisch den Eingabeaufentwicklung abgespielt, um beide Parteien darüber zu informieren, dass die Aufnahme aufgenommen wird. Es ist jedoch am besten, ihn mündlich zu bestätigen, Respekt zu zeigen. Verabschieden Sie sich von den vergangenen mühsamen Aufzeichnungsmethoden, z. Anrufinhalte, die auf dem iPhone aufgezeichnet wurden
 RC von MacOS Sequoia 15.2, iOS 18.2, iPados 18.2, zum Testen veröffentlichtMay 09, 2025 am 09:55 AM
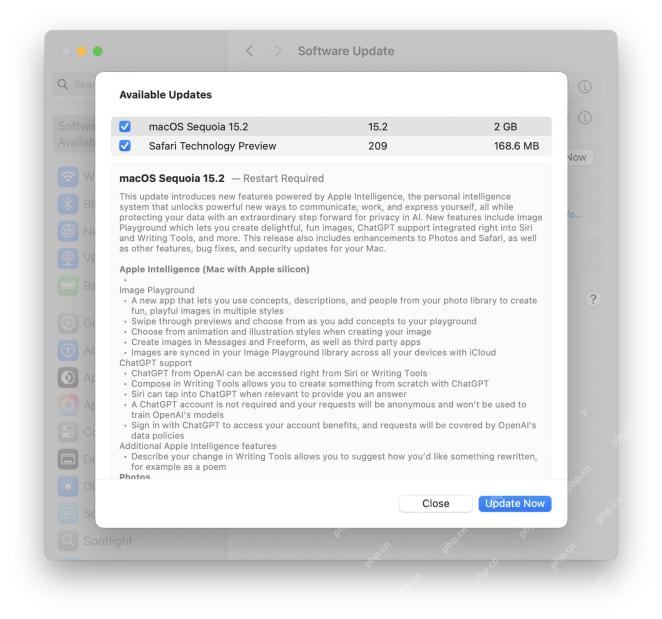
Apple veröffentlichte die IOS 18.2-, MacOS Sequoia 15.2- und iPados 18.2 -Versionskandidaten (RC) für alle Benutzer, die am Apple Systems -Software -Beta -Testprogramm teilnehmen. Die RC -Version ist normalerweise die endgültige Version der Beta -Version vor ihrer Veröffentlichung, die anzeigt, dass die offizielle Version von iOS 18.2, iPados 18.2 und MacOS Sequoia 15.2 bald veröffentlicht wird. Neben regelmäßigen Fehlerbehebungen und Sicherheitsverbesserungen konzentrieren sich diese bevorstehenden Software -Updates darauf, neue Apple Intelligence -Funktionen für kompatible Geräte, einschließlich Images, zu bringen
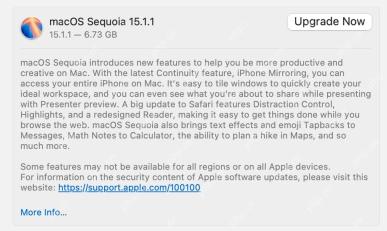 MacOS sequoia 15.1.1 mit Sicherheitsfixes jetzt verfügbarMay 09, 2025 am 09:40 AM
Apple hat das MacOS Sequoia 15.1.1 -Update veröffentlicht, ein kleines Software -Update, das hauptsächlich wichtige MAC -Sicherheitsbehebungen enthält. Dieses Update enthält keine neuen Funktionen, behebt jedoch mehrere Sicherheitslücken, die aktiv ausgenutzt werden. Daher wird dringend empfohlen, dieses wichtige Update auf Ihrem Apple -Gerät zu installieren. Darüber hinaus hat Apple iOS 18.1.1 für iPhone, iPados 18.1.1, VisionOs 2.1.1 und iOS 17.7.2 und iPados 17.7.2 veröffentlicht, die alle dieselben Sicherheitspatches enthalten. So herunterladen und installieren Sie Mac
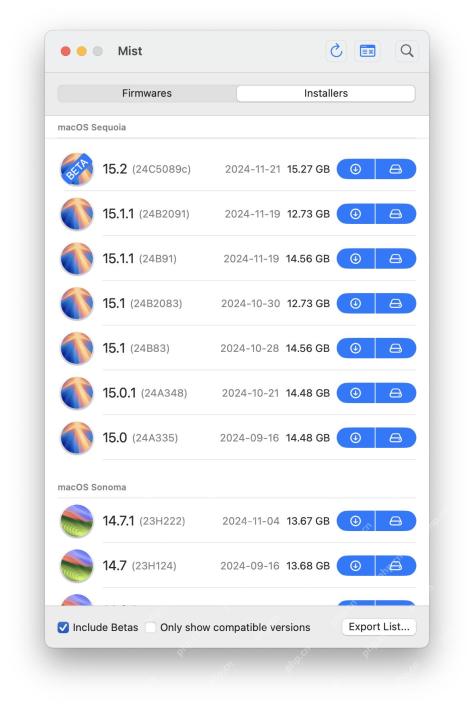 Mist erleichtert das Herunterladen von MacOS -Installatoren und FirmawaresMay 09, 2025 am 09:37 AM
Nebel: Ein leistungsstarkes Tool zum einfachen Herunterladen von MacOS -Installateuren und Firmware Viele Mac -Benutzer, IT -Mitarbeiter und Systemadministratoren halten gerne über MacOS -Installationsprogramme auf dem Laufenden, einschließlich aktueller und früherer Versionen von MacOS -Systemsoftware. Darüber hinaus müssen viele erweiterte Mac -Benutzer und IT -Fachleute jederzeit auf MACOS -IPSW -Firmware -Dateien zugreifen, um Apple Silicon Macs wiederherzustellen, sie für virtuelle Maschinen zu verwenden, und sogar für die Bereitstellung, Fehlerbehebung oder eine einfache Neukonfiguration und die Einrichtung Ihres Mac. Hier kommt das kostenlose Mist -Tool zum Spielen. Es macht es sehr einfach, die verfügbaren MACOS -IPSW -Firmware -Datei oder jede Version des MacOS -Installationsprogramms herunterzuladen. Obwohl wir es beibehalten


Heiße KI -Werkzeuge

Undresser.AI Undress
KI-gestützte App zum Erstellen realistischer Aktfotos

AI Clothes Remover
Online-KI-Tool zum Entfernen von Kleidung aus Fotos.

Undress AI Tool
Ausziehbilder kostenlos

Clothoff.io
KI-Kleiderentferner

Video Face Swap
Tauschen Sie Gesichter in jedem Video mühelos mit unserem völlig kostenlosen KI-Gesichtstausch-Tool aus!

Heißer Artikel
Heiße Werkzeuge

Sicherer Prüfungsbrowser
Safe Exam Browser ist eine sichere Browserumgebung für die sichere Teilnahme an Online-Prüfungen. Diese Software verwandelt jeden Computer in einen sicheren Arbeitsplatz. Es kontrolliert den Zugriff auf alle Dienstprogramme und verhindert, dass Schüler nicht autorisierte Ressourcen nutzen.

SublimeText3 Mac-Version
Codebearbeitungssoftware auf Gottesniveau (SublimeText3)

mPDF
mPDF ist eine PHP-Bibliothek, die PDF-Dateien aus UTF-8-codiertem HTML generieren kann. Der ursprüngliche Autor, Ian Back, hat mPDF geschrieben, um PDF-Dateien „on the fly“ von seiner Website auszugeben und verschiedene Sprachen zu verarbeiten. Es ist langsamer und erzeugt bei der Verwendung von Unicode-Schriftarten größere Dateien als Originalskripte wie HTML2FPDF, unterstützt aber CSS-Stile usw. und verfügt über viele Verbesserungen. Unterstützt fast alle Sprachen, einschließlich RTL (Arabisch und Hebräisch) und CJK (Chinesisch, Japanisch und Koreanisch). Unterstützt verschachtelte Elemente auf Blockebene (wie P, DIV),

Notepad++7.3.1
Einfach zu bedienender und kostenloser Code-Editor

WebStorm-Mac-Version
Nützliche JavaScript-Entwicklungstools

