


Sometimes a chance to show somebody how things are done proves more effective than having to come up with lengthy instructions. This is often true for educators, developers, IT support, YouTubers, online businesses, and teams working from different locations and even different time zones.
Taking a video of your actions as they happen on the screen of your Mac is called screen recording. (You can record your entire screen, a selected portion of the screen, or an app window.)
Ways to record screen with audio |
Steps to follow |
With a specialized third-party app |
Install and open CleanShot X. Choose Record Screen > Press Space bar > Click the microphone icon to Record MacBook Microphone or other source. Install and open iShowU. Set recording preferences and press the red circled dot in the bottom right corner of the app to start recording. |
With Mac’s webcam |
Install and open Capto. Choose the Record option from the toolbar > Select Record Camera > FaceTime HD Camera > Start recording. |
Using Mac’s built-in tools |
Use QuickTime from the menu bar to record the screen. |
With a Mac keyboard shortcut using a microphone |
Press Command + Shift + 5 > Click Options to turn on the audio recording > Record. |

Record your Mac’s screen with Capto
Capture, edit, and share your Mac screen effortlessly with Capto. Record any screen area and add real-time voiceovers.
Try free Security-testedThe best Mac screen recorder option for your Mac
A great comprehensive all-in-one tool for screen recording Mac users can rely on is Capto.
With Capto you get to not only record your screen with real-time voiceover and webcam feed, but also edit your video and audio tracks, add text or speech bubbles, and share instantly from the app:
- Capture a specific app window, a browser, your whole screen, or select an area of any size with any number of windows in it
- Hide desktop while recording
- Take screenshots
- Edit video and images: crop, cut, fade in and fade out for audio
- Add annotations
- Share to Dropbox, YouTube, Facebook, and all possible shared storages, including FTP/SFTP servers

You can also use iShowU to record your screen. This app is particularly handy for creating product walkthroughs and demos and it can record high quality video with a selfie cam overlay. This allows you to create videos with a “talking head” inserted in them.
iShowU can also replace the background in your selfie video to make it look more polished and professional.

How to record your screen on Mac using the Screenshot toolbar
If you’re wondering, “Can I screen record on my Mac with a native macOS utility?” the answer is — yes. Apple has its own built-in screen recording feature called Screenshot that lets you capture video of whatever’s happening on your screen (with real-time audio, should you choose to).
You can use the Screenshot toolbar for taking both screenshots and video recordings of your screen (for video choose from the last two screen icons with a dot in the lower right corner).
To record with Screenshot:
- Press Shift + Command + 5 to open the toolbar
- Choose Record Entire Screen or Record Selected Portion (you’ll be able to drag and resize the frame of the screen area you want to be recorded, if you choose this option)
- Go to Options and choose microphone settings, decide where you’d like to save your recording to, or set a countdown timer
- Click on Record to start the recording
- Click on Stop Recording menu bar icon when you’re done
If your Screenshot toolbar is already set to screen recording, you can use hotkeys for recording your screen: press Shift + Command + 5 to start the recording and Command + Control + Esc to stop the recording.
How to record audio in screen recordings
When you think about how to screen record on MacBook, it’s important to also understand how to include sound in your videos.
As we have already discussed, your native Mac screen recorder allows you to capture audio from your Mac’s built-in microphone, but if you’re looking for more advanced capabilities (like creating and editing voiceovers or learning to record your Skype meetings), you can find out more from our dedicated article on how to record your screen on Mac with sound.
How to screen record on Mac using QuickTime
Another option to record a screen Mac users can try is QuickTime Player. We know this app for playing media files, but it can also be used for recording your screen and sound.
To use QuickTime Player as a Mac screen recorder, simply launch it from Applications and choose New Screen Recording from the File menu. This will open the Screenshot toolbar that lets you configure and start your recording.
The only difference with Screenshot is that with QuickTime Player, once you’re done recording, your file will automatically open inside the app and you can edit it right away.

Read also:
- Crop Video on Mac
- No Clutter Screen Capturing for Mac
- Record Edit Share Videos on Mac
- Take A Scrolling Screenshot
How to screen record for collaboration
Another great tool for asynchronous screen sharing is CleanShot X.It’s a simple screen recording macOS app that comes with a rich toolkit, allowing you to capture your screen without desktop icons, record as MP4 or GIF, trim video, annotate, and keep your recordings saved on CleanShot’s cloud for free — all a few clicks on the menu bar icon away.

How to record a screen with OBS Studio
Another popular contender for Mac screen recorder of choice is OBS Studio.
OBS Studio is a free open-source app used for both streaming and screen recording by many content creators. It’s known for a variety of advanced features, but can also be easily used by beginners.
Understanding how to screen record on Mac with OBS Studio starts with the basics:
- Download (obsproject.com), install, and launch the app
- Set up video: Sources ➙ + icon ➙ Display Capture ➙ name the source ➙ OK
- Set up audio: OBS Studio is set to capture audio from the built-in microphone on your Mac by default — you can add external audio sources or apps for capturing system sound in Sources
- Choose where you want to save your recorded files: Controls ➙ Settings ➙ Output ➙ Recording ➙ Browse ➙ OK
- Choose Start Recording under Controls to begin screen recording Mac
- Press Stop Recording when you're finished

If you’re also looking for an advanced app to help you edit your recordings, check CamerBag Pro. It’s a powerful photo and video editor that allows for professional adjustments and offers pro-quality preset filters to add style to your creations.
How to record your screen on Mac and have an impact?
Being able to clearly get your point across even if you aren’t in the same room with your audience or colleagues is very important. Having a video recording to illustrate it — is priceless. Learning how to screen record on Mac is, without a doubt, a useful skill, and you can master it in no time with Mac’s built-in Screenshot and QuickTime Player or a more advanced OBS Studio screen recording setup.
If you’d like an effective tool that lets you both record and edit your videos from the same app on Mac, opt forCaptoorCleanShot X(if you also like creating GIFs). And, finally, for advance editing and pro quality image adjustments arm yourself withCamerBag Proto present your ideas with style.
Be sure to try Capto, CleanShot X, CameraBag Pro, and iShowU for free with the 7-day trial ofSetapp, a platform of high-performance apps for tasks on Mac and iPhone. Learn how to screen record MacBook and check out more than 250 other options to boost productivity.
FAQ
How to record screen and audio at the same time on Mac
All the above mentioned methods of screen recording Mac users can choose from allow for recording audio from Mac’s built-in mic: you can capture your voice commentary, as well as any sounds playing at the moment (music, app sounds, etc.)
How can I record my screen on Mac with sound but without a mic?
All Macs have an internal microphone built-in, so you don’t have to have an external microphone for capturing sound when screen recording Mac.
Where does screen recording go on a Mac?
The answer differs depending on the app you choose for recording your screen:
Mac’s native Screenshot utility saves recorded files to Desktop (you can choose a different location in Options ➙ Save to)
QuickTime Player automatically opens the video after you hit Stop Recording, and you can then choose where to save your file (File ➙ Save)
OBS Studio lets you locate recordings using the File menu (File ➙ Show Recordings)
-
Apps like CleanShot X save your files to your free in-app cloud account
What is the recording shortcut on Mac?
Use Shift + Command + 5 to start screen recording Mac.Das obige ist der detaillierte Inhalt vonSo Screen -Datensatz auf Mac: Einfach und schnell. Für weitere Informationen folgen Sie bitte anderen verwandten Artikeln auf der PHP chinesischen Website!

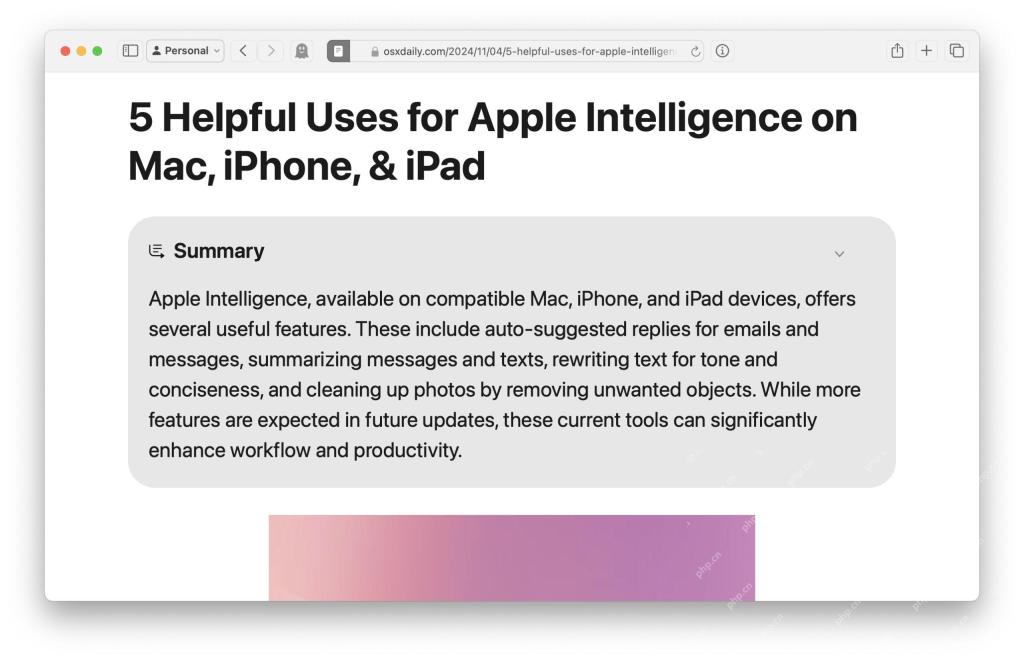 So fassen Sie Webseiten in Safari für Mac zusammenMay 09, 2025 am 10:47 AM
Safari Browsers leistungsstarke Web -Vereinfachungsfunktion: Verwenden Sie Apple Intelligence, um effizient zu lesen! Eine der integrierten Apple Intelligence-Funktionen des Safari-Browsers ist die Web-Snippet-Funktion. Unabhängig davon, ob der Inhalt einer Webseite eine langlebige oder eine normale Website ist, kann Apple Intelligence schnell eine Zusammenfassung erzeugen, wodurch Sie schnell das Verständnis von Webseiteninhalten und das Speichern von Zeit haben. Diese Funktion ist in Safari für Mac sehr bequem zu verwenden. Wie benutze ich die Web -Ssummary -Funktion in Safari für Mac? Wenn Sie einen Apple Silicon Mac mit MacOS Sequoia 15 oder später verwenden
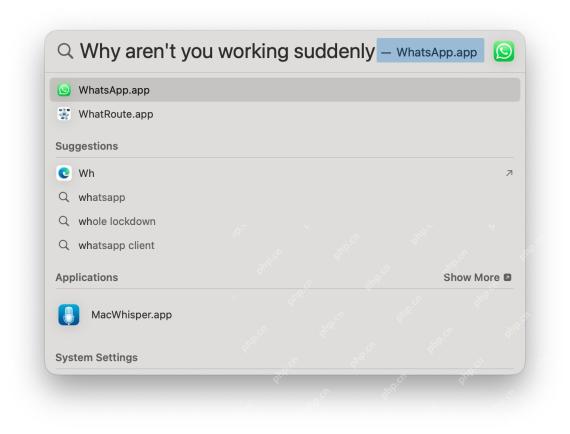 So beheben Sie Probleme mit Spotlight -Suchproblemen auf MacOS SequoiaMay 09, 2025 am 10:36 AM
Eine angemessene Anzahl von Mac -Benutzern hat festgestellt, dass die Spotlight -Suche in MacOS -Sequoia nicht gut funktioniert, entweder fehlende Dateien, Apps und manchmal überhaupt nicht, um eine lokale Datei zu finden. Für einige Benutzer treten die Probleme mit dem Spotlight direkt nach t auf
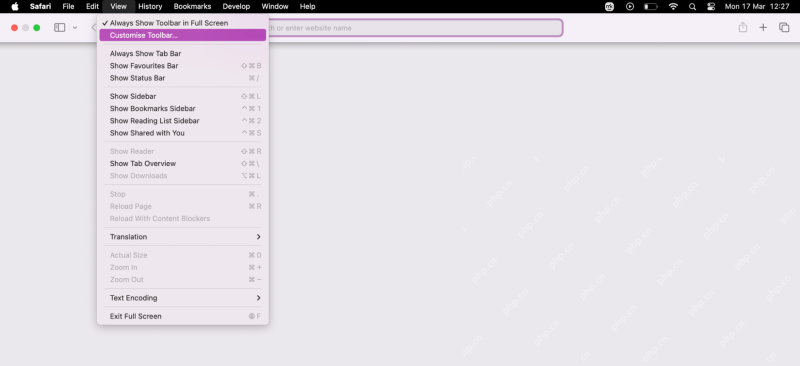 Wie kann ich Safari auf Mac anpassen? Wie personalisieren Sie es auf MacBook Air/Pro?May 09, 2025 am 10:35 AM
Personalisieren Sie Ihre Safari -Erfahrung auf MacBook: Ein umfassender Leitfaden Sie können Safari problemlos auf Ihrem MacBook anpassen, um Ihr Browsing -Erlebnis zu verbessern. Dieser Leitfaden bietet einen Schritt-für-Schritt-Ansatz zur Personalisierung verschiedener Aspekte von Safari aus dem t
![Wie kann man Benachrichtigungen zum iPhone zum Schweigen bringen? [Stumme Nachrichten und Apps auf iOS]](https://img.php.cn/upload/article/001/242/473/174675709271104.jpg?x-oss-process=image/resize,p_40) Wie kann man Benachrichtigungen zum iPhone zum Schweigen bringen? [Stumme Nachrichten und Apps auf iOS]May 09, 2025 am 10:18 AM
Wie kann man Benachrichtigungen zum iPhone zum Schweigen bringen? [Stumme Nachrichten und Apps auf iOS]May 09, 2025 am 10:18 AMStille iPhone -Benachrichtigungen: 6 Möglichkeiten, Ihren Frieden zu finden Benötigen Sie eine Pause von der ständigen Summe von iPhone -Benachrichtigungen? Dieser Leitfaden bietet sechs Methoden, um Ihr iPhone zum Schweigen zu bringen, von schnellen Umschaltungen bis hin zu geplanten Ruhezeiten. Lass uns eintauchen! 1. Fokusmodus: die
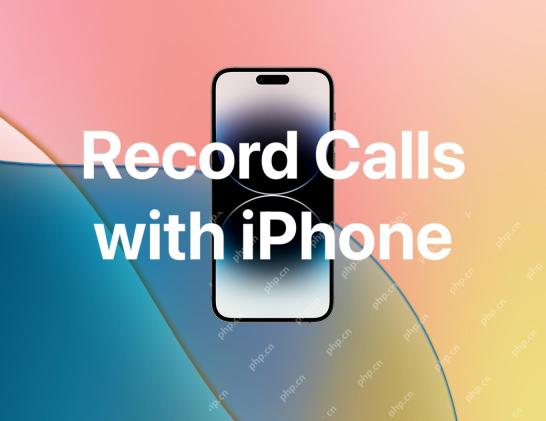 So zeichnen Sie Anrufe auf dem iPhone aufMay 09, 2025 am 10:15 AM
Die neue iPhone -Anrufaufzeichnungsfunktion in iOS 18.1 und höher macht die Aufzeichnung beispiellos einfach! Tippen Sie einfach auf die Schaltfläche "Aufzeichnung" auf dem Bildschirm, um die Aufzeichnung zu starten. Diese Schaltfläche befindet sich auf dem gleichen Bildschirm wie der Lautsprecher-, Stummschalt- und Stummschalter und macht sie bequem und schnell. Nach dem Start der Aufzeichnung wird das System automatisch den Eingabeaufentwicklung abgespielt, um beide Parteien darüber zu informieren, dass die Aufnahme aufgenommen wird. Es ist jedoch am besten, ihn mündlich zu bestätigen, Respekt zu zeigen. Verabschieden Sie sich von den vergangenen mühsamen Aufzeichnungsmethoden, z. Anrufinhalte, die auf dem iPhone aufgezeichnet wurden
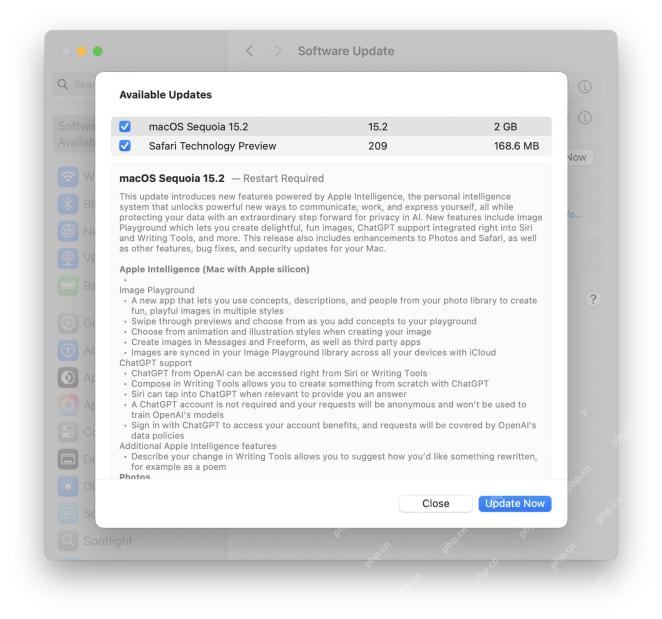 RC von MacOS Sequoia 15.2, iOS 18.2, iPados 18.2, zum Testen veröffentlichtMay 09, 2025 am 09:55 AM
Apple veröffentlichte die IOS 18.2-, MacOS Sequoia 15.2- und iPados 18.2 -Versionskandidaten (RC) für alle Benutzer, die am Apple Systems -Software -Beta -Testprogramm teilnehmen. Die RC -Version ist normalerweise die endgültige Version der Beta -Version vor ihrer Veröffentlichung, die anzeigt, dass die offizielle Version von iOS 18.2, iPados 18.2 und MacOS Sequoia 15.2 bald veröffentlicht wird. Neben regelmäßigen Fehlerbehebungen und Sicherheitsverbesserungen konzentrieren sich diese bevorstehenden Software -Updates darauf, neue Apple Intelligence -Funktionen für kompatible Geräte, einschließlich Images, zu bringen
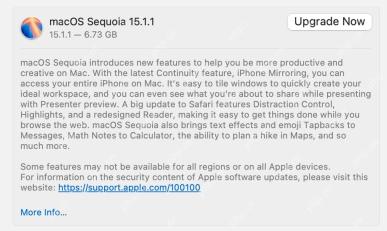 MacOS sequoia 15.1.1 mit Sicherheitsfixes jetzt verfügbarMay 09, 2025 am 09:40 AM
Apple hat das MacOS Sequoia 15.1.1 -Update veröffentlicht, ein kleines Software -Update, das hauptsächlich wichtige MAC -Sicherheitsbehebungen enthält. Dieses Update enthält keine neuen Funktionen, behebt jedoch mehrere Sicherheitslücken, die aktiv ausgenutzt werden. Daher wird dringend empfohlen, dieses wichtige Update auf Ihrem Apple -Gerät zu installieren. Darüber hinaus hat Apple iOS 18.1.1 für iPhone, iPados 18.1.1, VisionOs 2.1.1 und iOS 17.7.2 und iPados 17.7.2 veröffentlicht, die alle dieselben Sicherheitspatches enthalten. So herunterladen und installieren Sie Mac
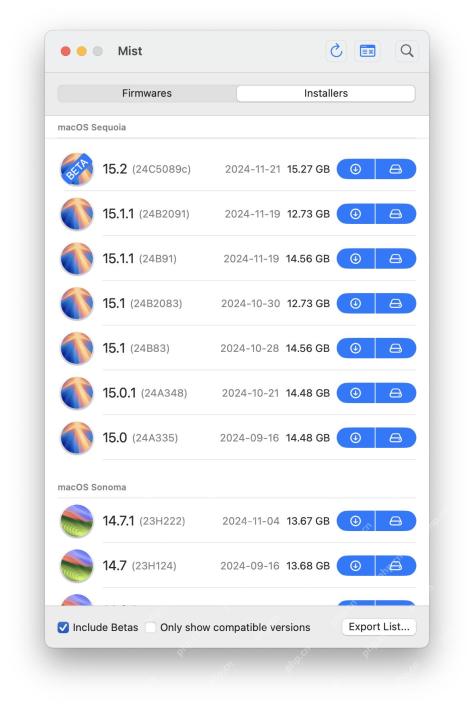 Mist erleichtert das Herunterladen von MacOS -Installatoren und FirmawaresMay 09, 2025 am 09:37 AM
Nebel: Ein leistungsstarkes Tool zum einfachen Herunterladen von MacOS -Installateuren und Firmware Viele Mac -Benutzer, IT -Mitarbeiter und Systemadministratoren halten gerne über MacOS -Installationsprogramme auf dem Laufenden, einschließlich aktueller und früherer Versionen von MacOS -Systemsoftware. Darüber hinaus müssen viele erweiterte Mac -Benutzer und IT -Fachleute jederzeit auf MACOS -IPSW -Firmware -Dateien zugreifen, um Apple Silicon Macs wiederherzustellen, sie für virtuelle Maschinen zu verwenden, und sogar für die Bereitstellung, Fehlerbehebung oder eine einfache Neukonfiguration und die Einrichtung Ihres Mac. Hier kommt das kostenlose Mist -Tool zum Spielen. Es macht es sehr einfach, die verfügbaren MACOS -IPSW -Firmware -Datei oder jede Version des MacOS -Installationsprogramms herunterzuladen. Obwohl wir es beibehalten


Heiße KI -Werkzeuge

Undresser.AI Undress
KI-gestützte App zum Erstellen realistischer Aktfotos

AI Clothes Remover
Online-KI-Tool zum Entfernen von Kleidung aus Fotos.

Undress AI Tool
Ausziehbilder kostenlos

Clothoff.io
KI-Kleiderentferner

Video Face Swap
Tauschen Sie Gesichter in jedem Video mühelos mit unserem völlig kostenlosen KI-Gesichtstausch-Tool aus!

Heißer Artikel
Heiße Werkzeuge

VSCode Windows 64-Bit-Download
Ein kostenloser und leistungsstarker IDE-Editor von Microsoft

SublimeText3 chinesische Version
Chinesische Version, sehr einfach zu bedienen

mPDF
mPDF ist eine PHP-Bibliothek, die PDF-Dateien aus UTF-8-codiertem HTML generieren kann. Der ursprüngliche Autor, Ian Back, hat mPDF geschrieben, um PDF-Dateien „on the fly“ von seiner Website auszugeben und verschiedene Sprachen zu verarbeiten. Es ist langsamer und erzeugt bei der Verwendung von Unicode-Schriftarten größere Dateien als Originalskripte wie HTML2FPDF, unterstützt aber CSS-Stile usw. und verfügt über viele Verbesserungen. Unterstützt fast alle Sprachen, einschließlich RTL (Arabisch und Hebräisch) und CJK (Chinesisch, Japanisch und Koreanisch). Unterstützt verschachtelte Elemente auf Blockebene (wie P, DIV),

Senden Sie Studio 13.0.1
Leistungsstarke integrierte PHP-Entwicklungsumgebung

Dreamweaver Mac
Visuelle Webentwicklungstools

