
Heim >Web-Frontend >js-Tutorial >So stellen Sie eine Next.js-App mithilfe von SST und Docker auf einem Hetzner-VPS bereit
So stellen Sie eine Next.js-App mithilfe von SST und Docker auf einem Hetzner-VPS bereit

- WBOYWBOYWBOYWBOYWBOYWBOYWBOYWBOYWBOYWBOYWBOYWBOYWBOriginal
- 2024-08-13 14:35:331110Durchsuche
Mein ursprünglicher Blogbeitrag: https://www.prudkohliad.com/articles/deploy-next-js-to-vps-using-sst-2024-08-11
SST ist ein Framework, das es einfach macht, moderne Full-Stack-Anwendungen auf Ihrer eigenen Infrastruktur zu erstellen. SST v3 verwendet Pulumi und Terraform
– SST-Dokumentation
In diesem Leitfaden werden wir eine Next.js-App auf einem Hetzner VPS mit SST und Docker bereitstellen. Dieser Leitfaden ist eine Fortsetzung meines vorherigen Beitrags. Wenn Sie hier etwas finden, das keinen Sinn ergibt, besteht eine gute Chance, dass Sie dort die Antworten finden – So stellen Sie eine Next.js-App mithilfe von Docker- und GitHub-Aktionen auf einem VPS auf Hetzner bereit.
Fügen Sie SST zum Projekt hinzu
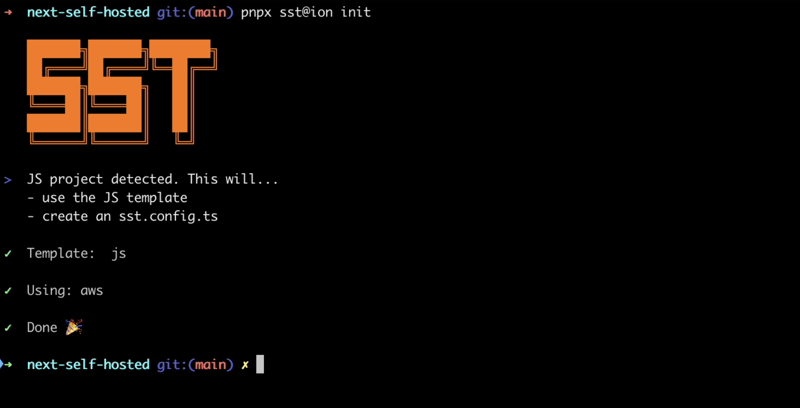
Um SST zum Projekt hinzuzufügen, führen Sie den folgenden Befehl aus:
pnpx sst@ion init
Dadurch wird eine interaktive Eingabeaufforderung angezeigt. Wählen Sie „Ja“ und dann „aws“:
Stellen Sie sicher, dass alle erforderlichen Pakete installiert sind:
pnpm install
Dadurch wird die Datei sst.config.ts erstellt, in der wir die gesamte Konfiguration hinzufügen werden.
Außerdem werden einige andere Dateien/Verzeichnisse erstellt. Fügen wir sie zu .dockerignore hinzu. Wir möchten nicht, dass sie im Docker-Image landen:
# sst
.sst
sst.config.ts
tsconfig.json
So sieht die SST-Konfigurationsdatei derzeit aus:
/// <reference path="./.sst/platform/config.d.ts" />

export default $config({
  app(input) {
    return {
      name: "next-self-hosted",
      removal: input?.stage === "production" ? "retain" : "remove",
      home: "aws",
    };
  },
  async run() {},
});
Wir werden AWS nicht verwenden, also setzen wir den Home-Parameter auf „local“:
/// <reference path="./.sst/platform/config.d.ts" />

export default $config({
  app(input) {
    return {
      name: "next-self-hosted",
      removal: input?.stage === "production" ? "retain" : "remove",
      home: "local",
    };
  },
  async run() {},
});
Jetzt können wir damit beginnen, Dinge zur run()-Funktion hinzuzufügen.
Erstellen Sie ein API-Token auf Hetzner
Um mit SST einen VPS auf Hetzner zu erstellen, benötigen wir ein Hetzner-API-Token. Lassen Sie uns ein neues generieren.
Öffnen Sie das Projekt in der Hetzner-Konsole und navigieren Sie zur Registerkarte „Sicherheit“:
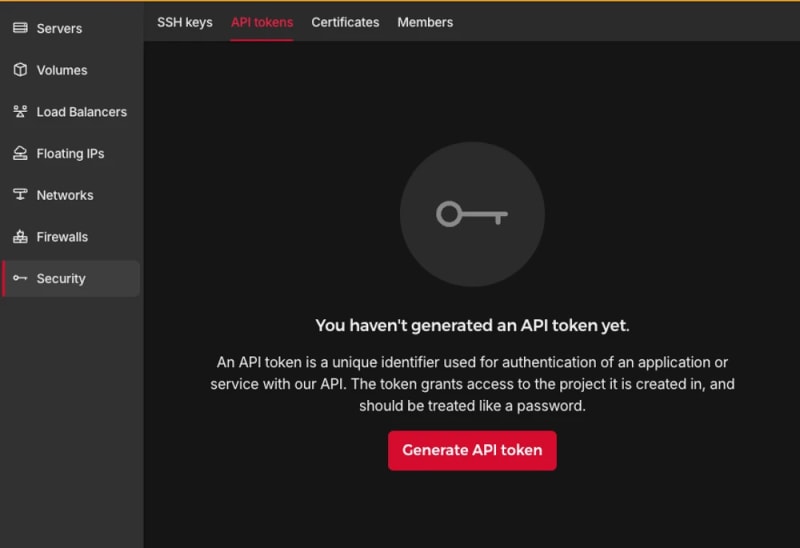
Generieren Sie ein API-Token:

Deinem Projekt wird ein neues Token hinzugefügt:

Der Token wird nur einmal angezeigt. Achten Sie darauf, dass Sie ihn nicht verlieren.
TLS- und Hetzner-Anbieter hinzufügen:
pnpm sst add tls
pnpm sst add hcloud
pnpm install
Generieren Sie einen SSH-Schlüssel
Um nach der Erstellung eines Hetzner-VPS weitere Befehle ausführen zu können, müssen wir sicherstellen, dass ihm während der Erstellung ein SSH-Schlüssel hinzugefügt wird. Dazu erstellen wir lokal ein SSH-Token und fügen dann seinen öffentlichen Teil zu Hetzner hinzu. Fügen Sie der Ausführungsfunktion den folgenden Code hinzu:
// In the run() function:

// Generate an SSH key
const sshKeyLocal = new tls.PrivateKey("SSH Key - Local", {
  algorithm: "ED25519",
});

// Add the SSH key to Hetzner
const sshKeyHetzner = new hcloud.SshKey("SSH Key - Hetzner", {
  publicKey: sshKeyLocal.publicKeyOpenssh,
});
Bereitstellen der App:
pnpm sst deploy

SST ❍ ion 0.1.90  ready!

➜  App:        next-self-hosted
   Stage:      antonprudkohliad

~  Deploy

|  Created     SSH Key - Local tls:index:PrivateKey
|  Created     SSH Key - Hetzner hcloud:index:SshKey

✓  Complete
Sie werden sehen, dass Hetzner ein neuer SSH-Schlüssel hinzugefügt wurde:

Jetzt können wir mit der Erstellung eines VPS fortfahren.
Erstellen Sie einen Server
Der folgende Befehl stellt sicher, dass in Ihrem Projekt ein neuer VPS erstellt wird:
// In the run() function:

// Create a Server on Hetzner
const server = new hcloud.Server("Server", {
  image: "docker-ce",
  serverType: "cx22",
  location: "nbg1",
  sshKeys: [sshKeyHetzner.id],
});
Hier verwende ich das Docker-ce-Image, da Docker bereits installiert ist. Sie können die Hetzner Cloud API verwenden, um alle verfügbaren Bilder, Servertypen und Rechenzentren aufzulisten.
Überprüfen Sie, ob der Server korrekt erstellt wurde:
pnpm sst deploy
SST ❍ ion 0.1.90  ready!

➜  App:        next-self-hosted
   Stage:      antonprudkohliad

~  Deploy

|  Created     Server hcloud:index:Server (34.5s)

✓  Complete
Sie sollten auch den neu erstellten Server in der Konsole sehen können:

Stellen Sie eine Verbindung zum Docker-Server auf dem VPS her
Um das Docker-Image der App auf dem VPS zu erstellen und Netzwerke, Volumes und Container erstellen zu können, müssen wir eine Brücke zwischen unserem lokalen Computer und dem Docker-Server auf dem VPS herstellen. Dazu benötigen wir den Docker-Anbieter:
pnpm sst add docker
pnpm install
Speichern Sie den privaten SSH-Schlüssel auf der Festplatte, damit der SSH-Client darauf zugreifen kann. Stellen Sie eine Verbindung zum Docker-Server auf dem VPS her:
// At the top of the file:
import { resolve as pathResolve } from "node:path";
import { writeFileSync as fsWriteFileSync } from "node:fs";

// In the run() function:

// Store the private SSH Key on disk to be able to pass it to the Docker
// Provider
const sshKeyLocalPath = sshKeyLocal.privateKeyOpenssh.apply((k) => {
  const path = "id_ed25519_hetzner";
  fsWriteFileSync(path, k, { mode: 0o600 });
  return pathResolve(path);
});

// Connect to the Docker Server on the Hetzner Server
const dockerServerHetzner = new docker.Provider("Docker Server - Hetzner", {
  host: $interpolate`ssh://root@${server.ipv4Address}`,
  sshOpts: ["-i", sshKeyLocalPath, "-o", "StrictHostKeyChecking=no"],
});
Stellen Sie sicher, dass Sie auch den privaten SSH-Schlüssel id_ed25519_hetzner zu .gitignore und .dockerignore hinzufügen, damit er nicht in Ihr GitHub-Repo und in das Docker-Image gelangt.
Lösen Sie die Bereitstellung aus, um die Änderungen zu überprüfen:
pnpm sst deploy
SST ❍ ion 0.1.90  ready!

➜  App:        next-self-hosted
   Stage:      antonprudkohliad

~  Deploy

|  Created     Docker Server - Hetzner pulumi:providers:docker

✓  Complete
Build the Docker image
Now we can build the Docker image on the remove Docker server:
// In the run() function:

// Build the Docker image
const dockerImageHetzner = new docker.Image(
  "Docker Image - App - Hetzner",
  {
    imageName: "next-self-hosted/next-self-hosted:latest",
    build: {
      context: pathResolve("./"),
      dockerfile: pathResolve("./Dockerfile"),
      target: "production",
      platform: "linux/amd64",
    },
    skipPush: true,
  },
  {
    provider: dockerServerHetzner,
    dependsOn: [server],
  }
);
Let’s trigger the deployment to see if everything works:
pnpm sst deploy
SST ❍ ion 0.1.90  ready!

➜  App:        next-self-hosted
   Stage:      antonprudkohliad

~  Deploy

|  Log         Starting Docker build
< ... A PRETTY LONG BUILD LOG HERE ... >
|  Log         Image built successfully, local id "sha256:629a6cdfc298c74599a3056278e31c64197a87f6d11aab09573bc9171d2f3362"
|  Created     Docker Image - App - Hetzner docker:index:Image (36.0s)

✓  Complete
Now, let’s check that Docker image made it to the server:
ssh root@116.203.183.180 -i ./id_ed25519_hetzner -o StrictHostKeyChecking=no -C "docker image ls"
REPOSITORY                          TAG       IMAGE ID       CREATED              SIZE
next-self-hosted/next-self-hosted   latest    629a6cdfc298   About a minute ago   712MB
Awesome!
Docker networks
We will create two networks: Public and Internal. The Public network is for services to which NGINX is connected, i.e. for services that have to be exposed to the outside (e.g. the Next.js application or an API server). The Internal network is for services that are not meant to be exposed to the outside e.g. Postgres database, Redis cache:
// In the run() function:

// Setup Docker Networks
const dockerNetworkPublic = new docker.Network(
  "Docker Network - Public",
  { name: "app_network_public" },
  { provider: dockerServerHetzner, dependsOn: [server] }
);
const dockerNetworkInternal = new docker.Network(
  "Docker Network - Internal",
  { name: "app_network_internal" },
  { provider: dockerServerHetzner, dependsOn: [server] }
);
Trigger the deployment:
pnpm sst deploy
SST ❍ ion 0.1.90  ready!

➜  App:        next-self-hosted
   Stage:      antonprudkohliad

~  Deploy

|  Created     Docker Network - Public docker:index:Network (2.3s)
|  Created     Docker Network - Internal docker:index:Network (3.1s)

✓  Complete
Check that networks app_network_internal and app_network_public are present on the remote:
ssh root@116.203.183.180 -i ./id_ed25519_hetzner -o StrictHostKeyChecking=no -C "docker network ls"
NETWORK ID     NAME                   DRIVER    SCOPE
0590360bd4ae   app_network_internal   bridge    local
e3bd8be72506   app_network_public     bridge    local
827fa5ca5de2   bridge                 bridge    local
dc8880514199   host                   host      local
f1481867db18   none                   null      local
Docker volumes
We will create a volume to store the application build files (the .next folder):
// In the run() function:

// Setup Docker Volumes
const dockerVolumeAppBuild = new docker.Volume(
  "Docker Volume - App Build",
  { name: "app_volume_build" },
  { provider: dockerServerHetzner, dependsOn: [server] }
);
Deploy and verify that the docker volume app_volume_build is present on the VPS:
pnpm sst deploy
SST ❍ ion 0.1.90  ready!

➜  App:        next-self-hosted
   Stage:      antonprudkohliad

~  Deploy

|  Created     Docker Volume - App Build docker:index:Volume

✓  Complete

ssh root@116.203.183.180 -i ./id_ed25519_hetzner -o StrictHostKeyChecking=no -C "docker volume ls"
DRIVER    VOLUME NAME
local     app_volume_build
The Build container
We are going to run a one-off container (a.k.a. Init Container) to build the Next.js application and store the result in the .next folder, that will be shared with the main application container through the volume that we have created above:
// In the run() function:

// Run a one-off container to build the app
const dockerAppBuildContainer = new docker.Container(
  "Docker Container - App Build",
  {
    name: "app_container_build",
    image: dockerImageHetzner.imageName,
    volumes: [
      {
        volumeName: dockerVolumeAppBuild.name,
        containerPath: "/app/.next",
      },
    ],
    command: ["pnpm", "build"],
    mustRun: true,
  },
  {
    provider: dockerServerHetzner,
  }
);
Deploy and verify via logs that the build has been successful:
pnpm sst deploy
SST ❍ ion 0.1.90  ready!

➜  App:        next-self-hosted
   Stage:      antonprudkohliad

~  Deploy

|  Created     Docker Container - App Build docker:index:Container (1.1s)

✓  Complete

ssh root@116.203.183.180 -i ./id_ed25519_hetzner -o StrictHostKeyChecking=no -C "docker logs -f app_container_build"

> next-self-hosted@ build /app
> next build

  ▲ Next.js 14.2.5

   Creating an optimized production build ...
 ✓ Compiled successfully
   Linting and checking validity of types ...
   Collecting page data ...
   Generating static pages (0/4) ...
   Generating static pages (1/4)
   Generating static pages (2/4)
   Generating static pages (3/4)
 ✓ Generating static pages (4/4)
   Finalizing page optimization ...
   Collecting build traces ...

Route (app)                              Size     First Load JS
┌ ○ /                                    142 B          87.2 kB
└ ○ /_not-found                          871 B          87.9 kB
+ First Load JS shared by all            87 kB
  ├ chunks/52d5e6ad-40eff88d15e66edb.js  53.6 kB
  ├ chunks/539-e1fa9689ed3badf0.js       31.5 kB
  └ other shared chunks (total)          1.84 kB

○  (Static)  prerendered as static content
The App container
Now we will add a “runner” container, that will use the build output from the Build container, and run next start:
// In the run() function:

const dockerAppContainer = new docker.Container(
  "Docker Container - App",
  {
    name: "app",
    image: dockerImageHetzner.imageName,
    volumes: [
      {
        volumeName: dockerVolumeAppBuild.name,
        containerPath: "/app/.next",
      },
    ],
    networksAdvanced: [
      { name: dockerNetworkPublic.id },
      { name: dockerNetworkInternal.id },
    ],
    command: ["pnpm", "start"],
    restart: "always",
  },
  { provider: dockerServerHetzner, dependsOn: [dockerAppBuildContainer] }
);
Deploy and verify that the app has started successfully:
pnpm sst deploy
SST ❍ ion 0.1.90  ready!

➜  App:        next-self-hosted
   Stage:      antonprudkohliad

~  Deploy

|  Created     Docker Container - App docker:index:Container (1.1s)

✓  Complete

ssh root@116.203.183.180 -i ./id_ed25519_hetzner -o StrictHostKeyChecking=no -C "docker logs -f app"

> next-self-hosted@ start /app
> next start

  ▲ Next.js 14.2.5
  - Local:        http://localhost:3000

 ✓ Starting...
 ✓ Ready in 497ms
The app container might fail, because the build container has not finished building yet, but it will soon recover and function normally.
Add Cloudflare certificates
In order to upload files to the VPS, we need to install the Command provider and the Polumi package:
pnpm sst add @pulumi/command
pnpm add -D @pulumi/pulumi
pnpm install
Make sure that the /root/app and /root/app/certs directories exist on the VPS and upload Cloudflare Origin Server certificates:
// At the top of the file
import { asset as pulumiAsset } from "@pulumi/pulumi";

// In the run() function:

// Make sure that app directory exists
new command.remote.Command("Command - Ensure app directory", {
  create: "mkdir -p /root/app",
  connection: {
    host: server.ipv4Address,
    user: "root",
    privateKey: sshKeyLocal.privateKeyOpenssh,
  },
});

// Make sure that app/certs directory exists
new command.remote.Command("Command - Ensure app/certs directory", {
  create: "mkdir -p /root/app/certs",
  connection: {
    host: server.ipv4Address,
    user: "root",
    privateKey: sshKeyLocal.privateKeyOpenssh,
  },
});

// Copy Certificates to the VPS
new command.remote.CopyToRemote(
  "Copy - Certificates - Key",
  {
    source: new pulumiAsset.FileAsset(
      pathResolve("./certs/cloudflare.key.pem")
    ),
    remotePath: "/root/app/certs/cloudflare.key.pem",
    connection: {
      host: server.ipv4Address,
      user: "root",
      privateKey: sshKeyLocal.privateKeyOpenssh,
    },
  }
);
new command.remote.CopyToRemote(
  "Copy - Certificates - Cert",
  {
    source: new pulumiAsset.FileAsset(
      pathResolve("./certs/cloudflare.cert.pem")
    ),
    remotePath: "/root/app/certs/cloudflare.cert.pem",
    connection: {
      host: server.ipv4Address,
      user: "root",
      privateKey: sshKeyLocal.privateKeyOpenssh,
    },
  }
);
new command.remote.CopyToRemote(
  "Copy - Certificates - Authenticated Origin Pull",
  {
    source: new pulumiAsset.FileAsset(
      pathResolve("./certs/authenticated_origin_pull_ca.pem")
    ),
    remotePath: "/root/app/certs/authenticated_origin_pull_ca.pem",
    connection: {
      host: server.ipv4Address,
      user: "root",
      privateKey: sshKeyLocal.privateKeyOpenssh,
    },
  }
);
Start Nginx
Copy Nginx configuration file to the VPS and start the Nginx container:
// In the run() function:

// Copy Nginx config to the VPS
const commandCopyNginxConfig = new command.remote.CopyToRemote(
  "Copy - Nginx Config",
  {
    source: new pulumiAsset.FileAsset(
      pathResolve("./nginx/production.conf")
    ),
    remotePath: "/root/app/nginx.conf",
    connection: {
      host: server.ipv4Address,
      user: "root",
      privateKey: sshKeyLocal.privateKeyOpenssh,
    },
  }
);

// Run the Nginx container
const dockerNginxContainer = new docker.Container(
  "Docker Container - Nginx",
  {
    name: "app_container_nginx",
    image: "nginx:1.27.0-bookworm",
    volumes: [
      {
        hostPath: "/root/app/nginx.conf",
        containerPath: "/etc/nginx/nginx.conf",
      },
      {
        hostPath: "/root/app/certs",
        containerPath: "/certs",
      },
    ],
    command: ["nginx", "-g", "daemon off;"],
    networksAdvanced: [{ name: dockerNetworkPublic.id }],
    restart: "always",
    ports: [
      {
        external: 443,
        internal: 443,
      },
    ],
    healthcheck: {
      tests: ["CMD", "service", "nginx", "status"],
      interval: "30s",
      timeout: "5s",
      retries: 5,
      startPeriod: "10s",
    },
  },
  { provider: dockerServerHetzner, dependsOn: [dockerAppContainer] }
);

return { ip: server.ipv4Address };
Deploy and verify that the Nginx container is running:
pnpm sst deploy
SST ❍ ion 0.1.90  ready!

➜  App:        next-self-hosted
   Stage:      antonprudkohliad

~  Deploy

|  Deleted     Docker Container - App Build docker:index:Container
|  Created     Command - Ensure app/certs directory command:remote:Command
|  Created     Command - Ensure app directory command:remote:Command
|  Created     Docker Container - App Build docker:index:Container
|  Created     Copy - Certificates - Cert command:remote:CopyToRemote (1.2s)
|  Created     Copy - Nginx Config command:remote:CopyToRemote (1.2s)
|  Created     Copy - Certificates - Key command:remote:CopyToRemote (1.2s)
|  Created     Copy - Certificates - Authenticated Origin Pull command:remote:CopyToRemote (1.2s)
|  Deleted     Docker Container - App docker:index:Container
|  Created     Docker Container - App docker:index:Container (1.2s)
|  Created     Docker Container - Nginx docker:index:Container (7.1s)

✓  Complete
   ip: 116.203.183.180

ssh root@116.203.183.180 -i ./id_ed25519_hetzner -o StrictHostKeyChecking=no -C "docker ps -a"

CONTAINER ID   IMAGE                                      COMMAND                  CREATED         STATUS                     PORTS                          NAMES
9c2cb18db304   nginx:1.27.0-bookworm                      "/docker-entrypoint.…"   3 minutes ago   Up 3 minutes (healthy)     80/tcp, 0.0.0.0:443->443/tcp   app_container_nginx
32e6a4cee8bc   next-self-hosted/next-self-hosted:latest   "docker-entrypoint.s…"   4 minutes ago   Up 3 minutes               3000/tcp                       app
f0c50aa32493   next-self-hosted/next-self-hosted:latest   "docker-entrypoint.s…"   4 minutes ago   Exited (0) 3 minutes ago                                  app_container_build
As you can see, Nginx and the application are running smoothly.
The final check
It’s time to make sure that the DNS record is pointing to the right IP address (yes, it is possible to add this to the SST config too, via the Cloudflare provider):

Then, we can open the application and verify that it works:

Congratulations! We have now completed out SST dive and can enjoy the freshly deployed application ?
Cleaning up
SST makes it very easy to clean up – just run pnpm sst remove and the whole setup will go away:
pnpm sst remove
SST ❍ ion 0.1.90  ready!

➜  App:        next-self-hosted
   Stage:      antonprudkohliad

~  Remove

|  Deleted     Docker Container - Nginx docker:index:Container (1.9s)
|  Deleted     Docker Container - App docker:index:Container
|  Deleted     Docker Container - App Build docker:index:Container
|  Deleted     Docker Image - App - Hetzner docker:index:Image
|  Deleted     Docker Volume - App Build docker:index:Volume (2.1s)
|  Deleted     Docker Network - Public docker:index:Network (3.1s)
|  Deleted     Docker Network - Internal docker:index:Network (3.2s)
|  Deleted     Copy - Nginx Config command:remote:CopyToRemote
|  Deleted     Docker Server - Hetzner pulumi:providers:docker
|  Deleted     Copy - Certificates - Authenticated Origin Pull command:remote:CopyToRemote
|  Deleted     Command - Ensure app/certs directory command:remote:Command
|  Deleted     Copy - Certificates - Key command:remote:CopyToRemote
|  Deleted     Command - Ensure app directory command:remote:Command
|  Deleted     Copy - Certificates - Cert command:remote:CopyToRemote
|  Deleted     Server hcloud:index:Server (16.8s)
|  Deleted     SSH Key - Hetzner hcloud:index:SshKey
|  Deleted     SSH Key - Local tls:index:PrivateKey

✓  Removed
Das obige ist der detaillierte Inhalt vonSo stellen Sie eine Next.js-App mithilfe von SST und Docker auf einem Hetzner-VPS bereit. Für weitere Informationen folgen Sie bitte anderen verwandten Artikeln auf der PHP chinesischen Website!
In Verbindung stehende Artikel
Mehr sehen- Eine eingehende Analyse der Bootstrap-Listengruppenkomponente
- Detaillierte Erläuterung des JavaScript-Funktions-Curryings
- Vollständiges Beispiel für die Generierung von JS-Passwörtern und die Erkennung der Stärke (mit Download des Demo-Quellcodes)
- Angularjs integriert WeChat UI (weui)
- Wie man mit JavaScript schnell zwischen traditionellem Chinesisch und vereinfachtem Chinesisch wechselt und wie Websites den Wechsel zwischen vereinfachtem und traditionellem Chinesisch unterstützen – Javascript-Kenntnisse