Heim >Backend-Entwicklung >Python-Tutorial >Windows下Eclipse+PyDev配置Python+PyQt4开发环境
Windows下Eclipse+PyDev配置Python+PyQt4开发环境
- WBOYWBOYWBOYWBOYWBOYWBOYWBOYWBOYWBOYWBOYWBOYWBOYWBOriginal
- 2016-06-10 15:04:511876Durchsuche
本文为大家分享了Windows下配置Python PyQt4开发环境的详细步骤,供大家参考,具体内容如下
1. 下载相关软件
Eclipse下载地址:http://www.eclipse.org/downloads/
JRE下载地址:http://www.java.com/zh_CN/download/manual.jsp
PyDev下载地址: http://sourceforge.net/projects/pydev/
Python下载地址:http://www.python.org/getit/
PyQt4下载地址:http://www.riverbankcomputing.co.uk/software/pyqt/download
2. 安装jre、Python、PyQt,安装采用默认设置,一路点Next即可
操作系统为:Windows 7 旗舰版 64bit
软件版本如下:
jre-7u9-windows-x64.exe
python-3.3.0.msi
PyQt-Py3.3-x86-gpl-4.9.5-1.exe
3. 解压缩Eclipse以及PyDev压缩包
3.1 将Eclipse压缩包(eclipse-jee-indigo-SR1-win32-x86_64.zip)解压至某个文件夹(c:\eclipse)
3.2 将PyDev压缩包(PyDev 2.7.1.zip)解压,将两个文件夹覆盖Eclipse下的同名文件夹即可
4. 配置Eclipse
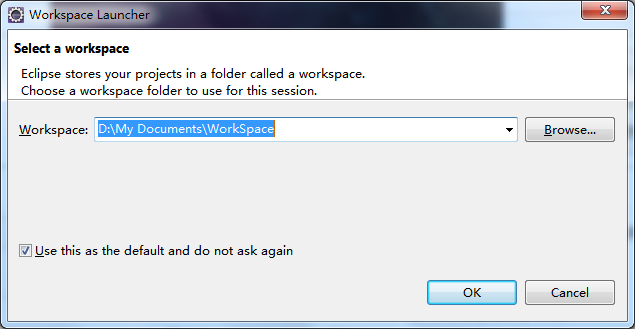
4.1 打开eclipse.exe,第一次需配置workspace路径
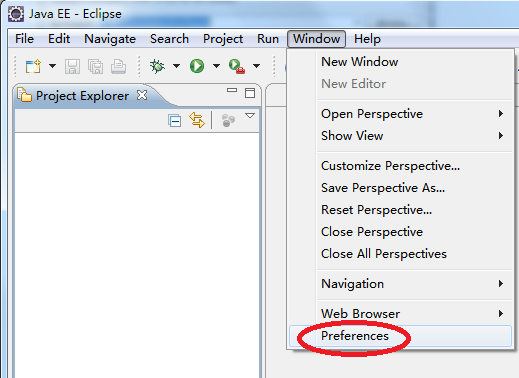
4.2 选择window --> Preferences
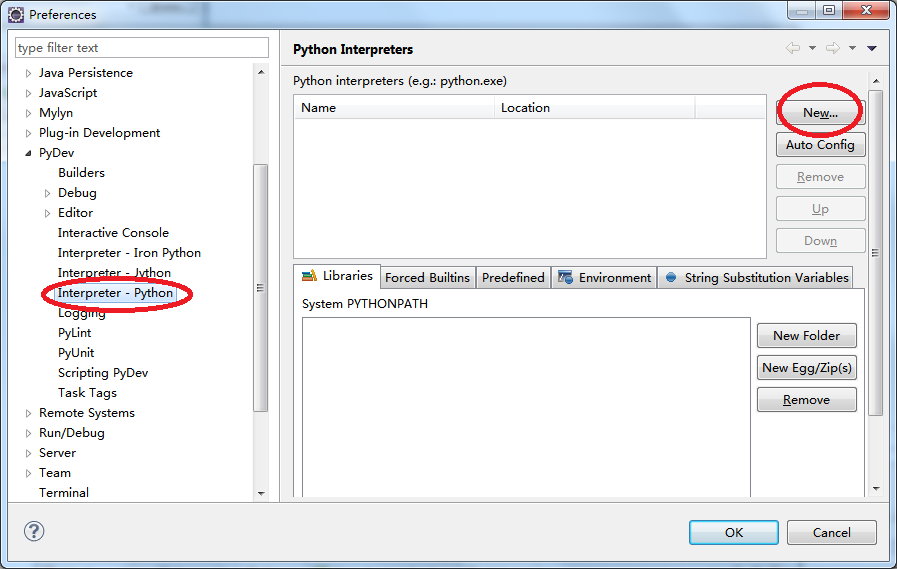
4.3 在弹出的对话框中选择PyDev --> Interpreter - Python,点击按钮”New...“
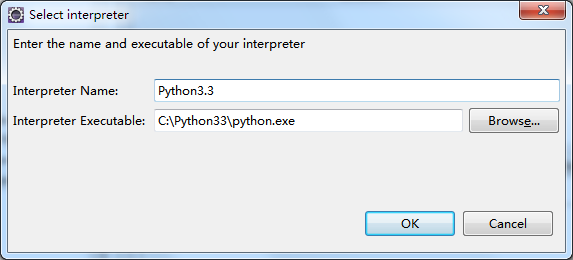
4.4 输入Python解释器的名称与python.exe地址,点OK确定
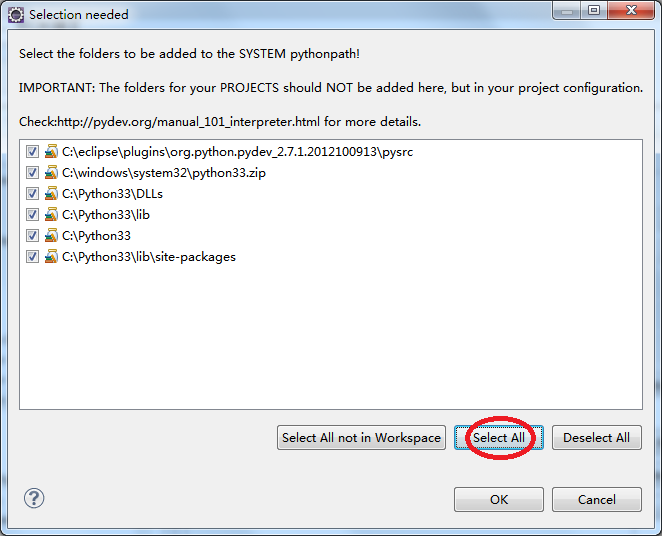
4.5 选择"Select All", 点OK确认
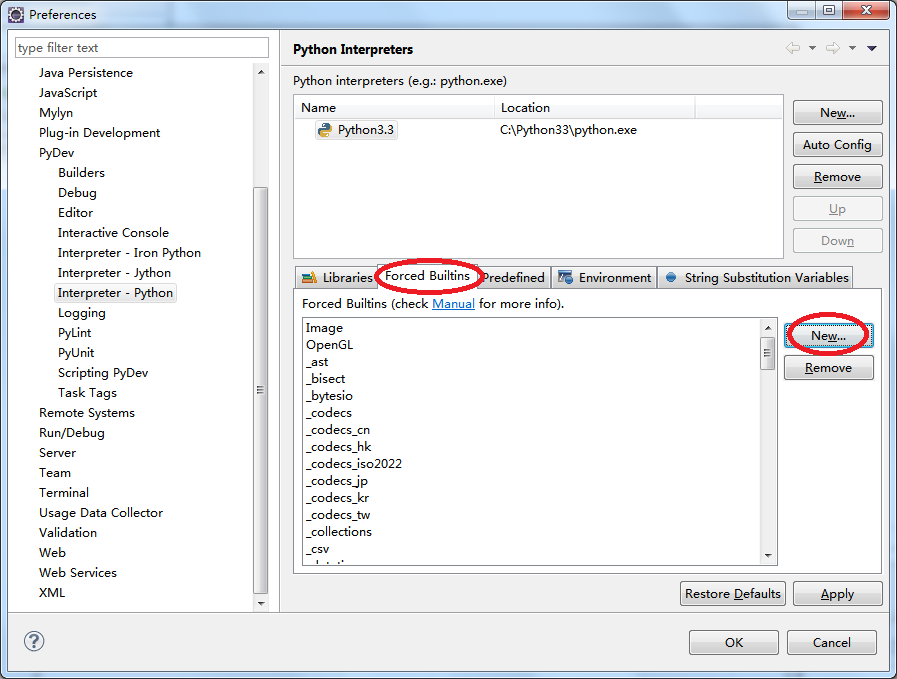
4.6 点击”Forced Builtins“,选择”New...“
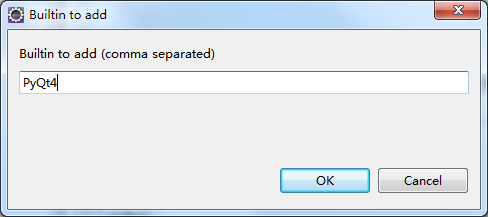
4.7 输入"PyQt4",点确定
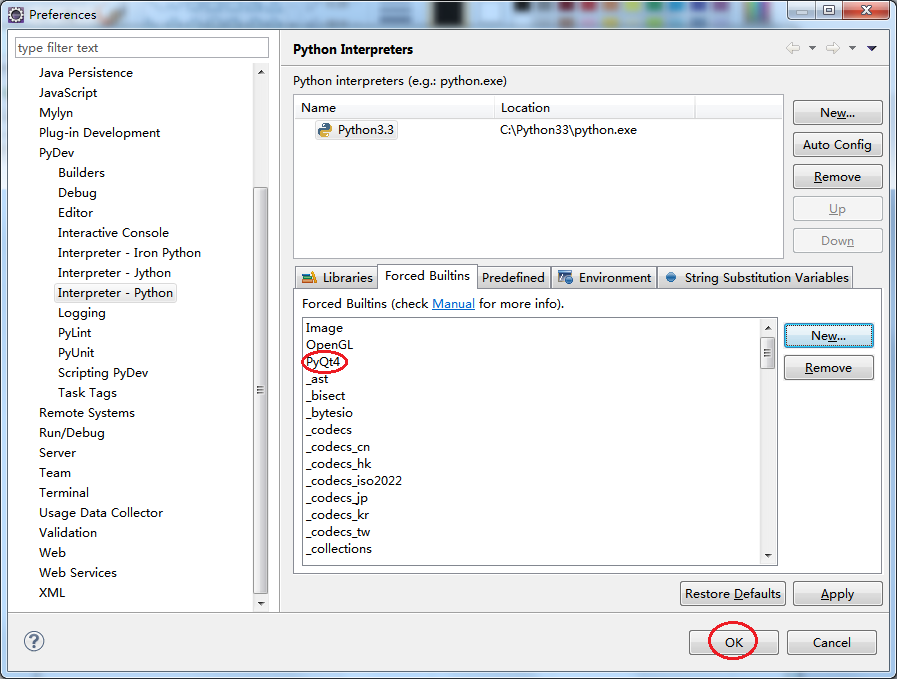
4.8 确定Forced Builtins里有PyQt4后,点OK
5. 新建一个PyDev Project
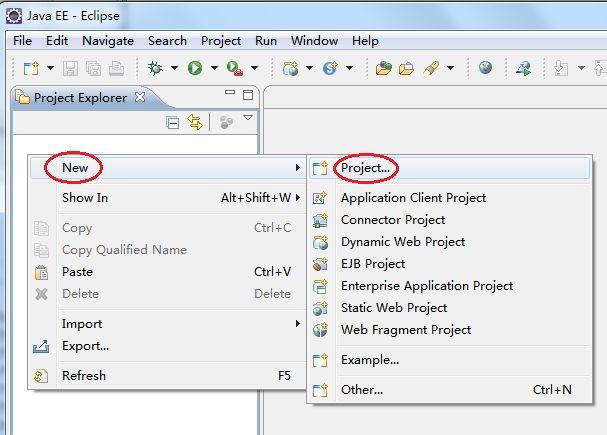
5.1 鼠标右键选择New --> Project
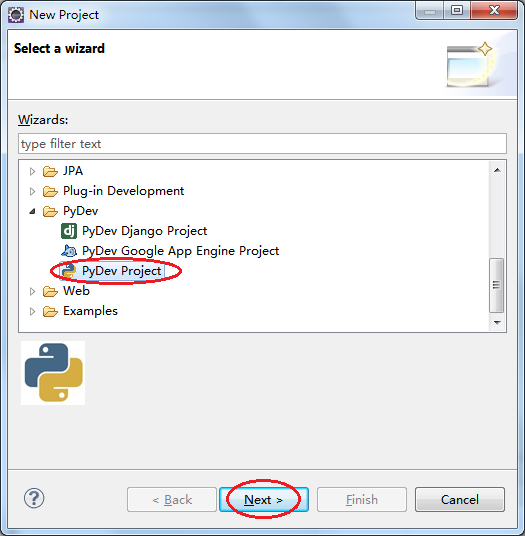
5.2 选择PyDev --> PyDev Project, 点Next
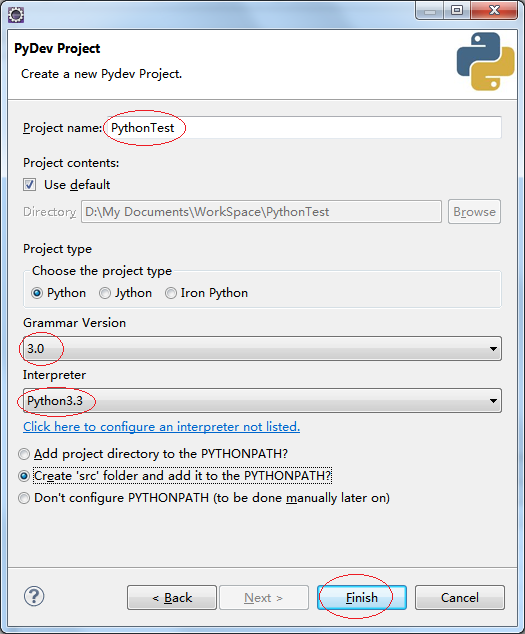
5.3 填入Project Name,选择Grammar Version --> 3.0,选择Interpreter --> Python3.3,点Finish
6. 编写测试代码
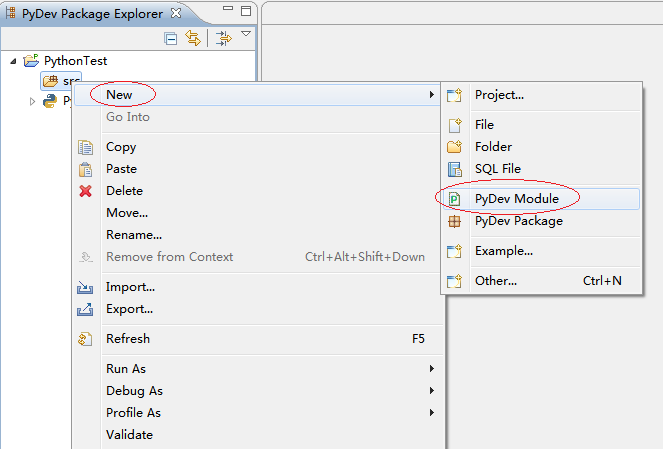
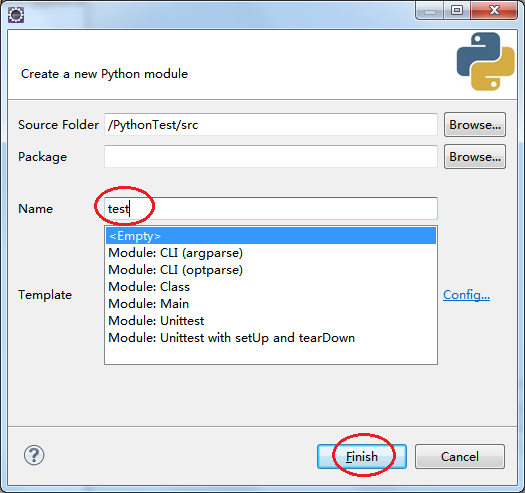
6.1 在src文件夹右键New --> PyDev Module新建一个Python Module
6.2 输入module名字,点Finish
6.3 测试Python
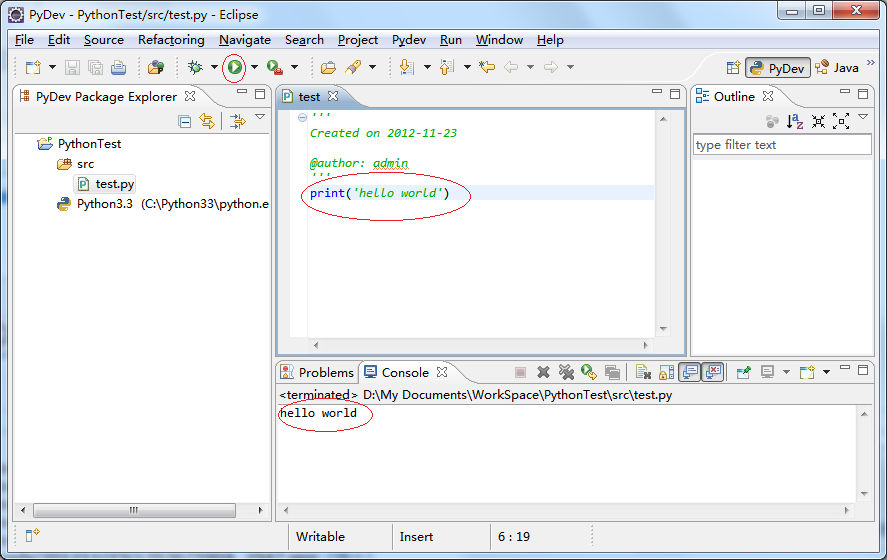
测试代码:
print("hello world")
点击绿色run按钮执行
Console栏输出正常即OK
6.4 测试PyQt4
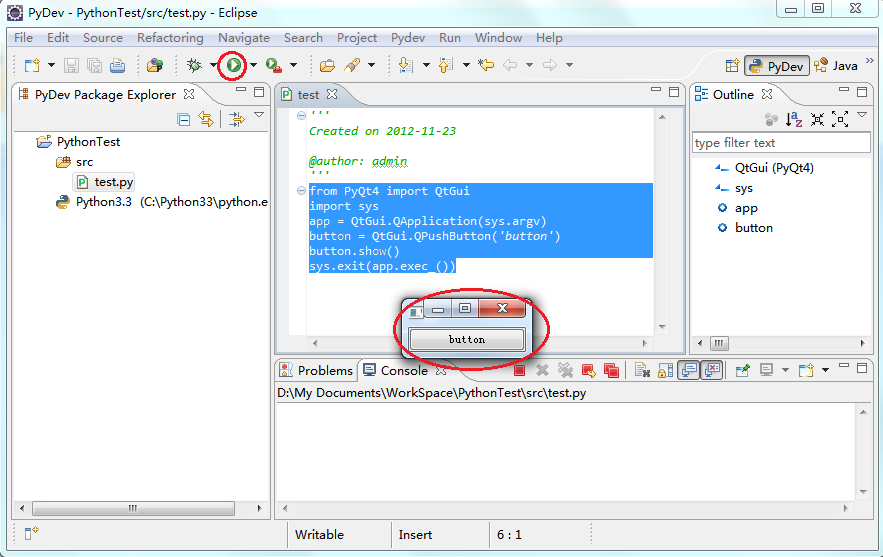
测试代码:
from PyQt4 import QtGui
import sys
app = QtGui.QApplication(sys.argv)
button = QtGui.QPushButton('button')
button.show()
sys.exit(app.exec_())
点击绿色run按钮执行
有button窗口弹出即OK
以上就是本文的全部内容,希望对大家的学习有所帮助。

