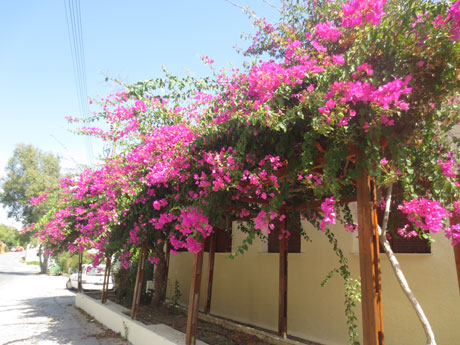
picture
Responsive Web Design - Pictures
Use the width attribute
If the width attribute is set to 100%, the picture will be implemented according to the upper and lower ranges Responsive function:
Instance
<!DOCTYPE html>
<html>
<head>
<meta name="viewport" content="width=device-width, initial-scale=1.0">
<meta charset="utf-8">
<title>php 中文网</title>
<style>
img {
    width: 100%;
    height: auto;
}
</style>
</head>
<body>

<img src="https://img.php.cn/upload/article/000/000/024/5c668566136f4479.jpg" width="460" height="345">
<p>调整浏览器窗口查看图像是如何扩展的。</p>

</body>
</html>
Run instance»
Click the "Run instance" button to view the online instance
Note that in the above example, the image will be larger than its original image. We can use the max-width attribute to solve this problem very well.
Use the max-width attribute
If the max-width attribute is set to 100%, the image will never be larger than its original size:
Example
<!DOCTYPE html>
<html>
<head>
<meta name="viewport" content="width=device-width, initial-scale=1.0">
<meta charset="utf-8">
<title>php 中文网</title>
<style>
img {
    max-width: 100%;
    height: auto;
}
</style>
</head>
<body>

<img src="https://img.php.cn/upload/article/000/000/024/5c668566136f4479.jpg" width="460" height="345">
<p>调整浏览器大小,在宽度小于 460px 时查看图片比例变化。</p>

</body>
</html>
Run instance»
Click the "Run instance" button to view the online instance
Add pictures to the webpage
Instance
<!DOCTYPE html>
<html>
<head>
<meta name="viewport" content="width=device-width, initial-scale=1.0">
<meta charset="utf-8">
<title>php中文网(php.cn)</title>
<style>
* {
    box-sizing: border-box;
}
img {
    width: 100%;
    height: auto;
}
.row:after {
    content: "";
    clear: both;
    display: block;
}
[class*="col-"] {
    float: left;
    padding: 15px;
    width: 100%;
}
@media only screen and (min-width: 600px) {
    .col-s-1 {width: 8.33%;}
    .col-s-2 {width: 16.66%;}
    .col-s-3 {width: 25%;}
    .col-s-4 {width: 33.33%;}
    .col-s-5 {width: 41.66%;}
    .col-s-6 {width: 50%;}
    .col-s-7 {width: 58.33%;}
    .col-s-8 {width: 66.66%;}
    .col-s-9 {width: 75%;}
    .col-s-10 {width: 83.33%;}
    .col-s-11 {width: 91.66%;}
    .col-s-12 {width: 100%;}
}
@media only screen and (min-width: 768px) {
    .col-1 {width: 8.33%;}
    .col-2 {width: 16.66%;}
    .col-3 {width: 25%;}
    .col-4 {width: 33.33%;}
    .col-5 {width: 41.66%;}
    .col-6 {width: 50%;}
    .col-7 {width: 58.33%;}
    .col-8 {width: 66.66%;}
    .col-9 {width: 75%;}
    .col-10 {width: 83.33%;}
    .col-11 {width: 91.66%;}
    .col-12 {width: 100%;}
}
html {
    font-family: "Lucida Sans", sans-serif;
}
.header {
    background-color: #9933cc;
    color: #ffffff;
    padding: 15px;
}
.menu ul {
    list-style-type: none;
    margin: 0;
    padding: 0;
}
.menu li {
    padding: 8px;
    margin-bottom: 7px;
    background-color :#33b5e5;
    color: #ffffff;
    box-shadow: 0 1px 3px rgba(0,0,0,0.12), 0 1px 2px rgba(0,0,0,0.24);
}
.menu li:hover {
    background-color: #0099cc;
}
.aside {
    background-color: #33b5e5;
    padding: 15px;
    color: #ffffff;
    text-align: center;
    font-size: 14px;
    box-shadow: 0 1px 3px rgba(0,0,0,0.12), 0 1px 2px rgba(0,0,0,0.24);
}
.footer {
    background-color: #0099cc;
    color: #ffffff;
    text-align: center;
    font-size: 12px;
    padding: 15px;
}
</style>
</head>
<body>

<div class="header">
<h1>Chania</h1>
</div>

<div class="row">
<div class="col-3 col-s-3 menu">
<ul>
<li>The Flight</li>
<li>The City</li>
<li>The Island</li>
<li>The Food</li>
</ul>
</div>

<div class="col-6 col-s-9">
<h1>The City</h1>
<p>Chania is the capital of the Chania region on the island of Crete. The city can be divided in two parts, the old town and the modern city.</p>
<img src="https://img.php.cn/upload/article/000/000/024/5c668566136f4479.jpg" width="460" height="345">
</div>

<div class="col-3 col-s-12">
<div class="aside">
<h2>What?</h2>
<p>Chania is a city on the island of Crete.</p>
<h2>Where?</h2>
<p>Crete is a Greek island in the Mediterranean Sea.</p>
<h2>How?</h2>
<p>You can reach Chania airport from all over Europe.</p>
</div>
</div>

</div>

<div class="footer">
<p>调整浏览器窗口大小查看内容变化。</p>
</div>

</body>
</html>
Run instance?
Click the "Run Instance" button to view the online instance
Background Image
Background image can be resized or scaled responsively.
The following are three different methods:
1. If the background-size property is set to "contain", the background image will adapt proportionally to the content area. The image keeps its proportions:
Here is the CSS code:
Example
<!DOCTYPE html>
<html>
<head>
<meta name="viewport" content="width=device-width, initial-scale=1.0">
<meta charset="utf-8">
<title>php 中文网</title>
<style>
div {
    width: 100%;
    height: 400px;
    background-image: url('https://img.php.cn/upload/article/000/000/024/5c66874932cfb699.jpg');
    background-repeat: no-repeat;
    background-size: contain;
    border: 1px solid red;
}
</style>
</head>
<body>

<p>调整浏览器大小查看效果。</p>

<div></div>

</body>
</html>
Run instance»
Click the "Run instance" button to view the online instance
2. If the background-size attribute is set to "100% 100%", the background The image will stretch to cover the entire area:
Instance
<!DOCTYPE html>
<html>
<head>
<meta name="viewport" content="width=device-width, initial-scale=1.0">
<meta charset="utf-8">
<title>php 中文网</title>
<style>
div {
    width: 100%;
    height: 400px;
    background-image: url('https://img.php.cn/upload/article/000/000/024/5c66874932cfb699.jpg');
    background-size: 100% 100%;
    border: 1px solid red;
}
</style>
</head>
<body>

<p>调整浏览器大小查看效果。</p>

<div></div>

</body>
</html>
Run Instance»
Click the "Run Instance" button to view the online instance
3. If the background-size property is set to "cover", the background image will be expanded to be large enough so that the background image completely covers the background area. Note that this property maintains the proportions of the image so Some parts of the background image cannot be displayed in the background anchor area.
This is the CSS code:
Example
<!DOCTYPE html>
<html>
<head>
<meta name="viewport" content="width=device-width, initial-scale=1.0">
<meta charset="utf-8">
<title>php 中文网</title>
<style>
div {
    width: 100%;
    height: 400px;
    background-image: url('https://img.php.cn/upload/article/000/000/024/5c66874932cfb699.jpg');
    background-size: cover;
    border: 1px solid red;
}
</style>
</head>
<body>

<p>调整浏览器大小查看效果。</p>

<div></div>

</body>
</html>
Run Example»
Click the "Run Instance" button to view the online instance
Different devices display different pictures
Large size pictures can be displayed on large screens, but on small screens It really doesn't display well on the screen. There is no need for us to load large images on a small screen, as this will affect the loading speed. So we can use media queries to display different images based on different devices.
The following large and small pictures will be displayed on different devices:


Instance
<!DOCTYPE html>
<html>
<head>
<meta name="viewport" content="width=device-width, initial-scale=1.0">
<meta charset="utf-8">
<title>php 中文网</title>
<style>
/* For width smaller than 400px: */
body {
    background-repeat: no-repeat;
    background-image: url('https://img.php.cn/upload/article/000/000/024/5c66874932cfb699.jpg');
}

/* For width 400px and larger: */
@media only screen and (min-width: 400px) {
    body {
       background-image: url('https://img.php.cn/upload/article/000/000/024/5c66874932cfb699.jpg');
    }
}
</style>
</head>
<body>

<p style="margin-top:360px;">调整浏览器宽度,背景图片在小于 400 px 时将改变。</p>

</body>
</html>
Run instance»
Click the "Run instance" button to view the online instance
You can use the min-device-width of the media query instead of the min-width attribute , it will detect the device width instead of the browser width. Image size does not change when the browser is resized.
Instance
<!DOCTYPE html>
<html>
<head>
<meta name="viewport" content="width=device-width, initial-scale=1.0">
<meta charset="utf-8">
<title>php 中文网</title>
<style>
/* For device width smaller than 400px: */
body {
    background-repeat: no-repeat;
    background-image: url('https://img.php.cn/upload/article/000/000/024/5c66874932cfb699.jpg');
}

/* For device width 400px and larger: */
@media only screen and (min-device-width: 400px) {
    body {
       background-image: url('https://img.php.cn/upload/article/000/000/024/5c66874932cfb699.jpg');
    }
}
</style>
</head>
<body>

</body>
</html>
Run instance »
Click the "Run instance" button to view the online instance
HTML5 <picture> element
The <picture> element of HTML5 can set multiple pictures.
Browser support
| Function |  |  |  | ||
| Not supported | 38.0 | 38.0 | Not supported | 25.0 |
Elements similar to <video> and <audio> elements. Different resources can be configured. The first resource set is the preferred one:
<!DOCTYPE html>
<html>
<head>
<meta name="viewport" content="width=device-width, initial-scale=1.0">
<meta charset="utf-8">
<title>php 中文网</title>
</head>
<body>

<picture>
    <source srcset="https://img.php.cn/upload/article/000/000/024/5c66874932cfb699.jpg" media="(max-width: 400px)">
    <source srcset="https://img.php.cn/upload/article/000/000/024/5c66874932cfb699.jpg">
    <img src="https://img.php.cn/upload/article/000/000/024/5c66874932cfb699.jpg" alt="Flowers" style="width:auto;">
</picture>

<p>调整浏览器宽度和高度,背景在宽度小于 400px 时将改变。 </p>

</body>
</html>
Running Instance»Click the "Run Instance" button to view the online instance
The attribute is required and defines the image resource.
The attribute is optional and can be viewed for details in the CSS @media rule of the media query. For browsers that do not support the
element, you can also define the <img> element instead.


