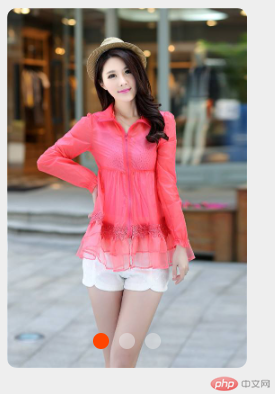
实例演示仿淘宝移动端轮播图
<title>实战: 仿淘宝移动端轮播图-布局</title><link rel="stylesheet" href="static/css/1.css" /></head><body><div class="slideshow"><!-- 1. 图片容器 --><div class="imgs"><img src="static/images/item1.jpeg" alt="" class="active" /><img src="static/images/item2.jpeg" alt="" /><img src="static/images/item3.jpeg" alt="" /></div><!-- 2. 按钮容器 --><div class="btns"><span class="active"></span><span></span><span></span></div></div></body>
···
body {
background-color: #eee;
}
/ 轮播图容器 /
.slideshow {
width: 240px;
height: 360px;
}
/ 图片容器 /
.slideshow .imgs {
width: inherit;
height: inherit;
}
/ 图片适应 /
.slideshow img {
width: 100%;
height: 100%;
border-radius: 10px;
/ 默认全隐藏 /
display: none;
}
/ 设置图片的激活状态 /
.slideshow img.active {
display: block;
}
.slideshow img:hover {
cursor: pointer;
}
/ ——— 按钮容器 ———- /
/ 按钮容器 /
.slideshow .btns {
display: flex;
place-content: center;
/ position: relative;
top: -40px; /
transform: translateY(-40px);
}
.slideshow .btns > span {
background-color: rgba(233, 233, 233, 0.5);
height: 16px;
width: 16px;
border-radius: 50%;
margin: 5px;
}
.slideshow .btns > span.active {
background-color: orangered;
}
.slideshow .btns > span:hover {
cursor: pointer;
}
···
···
// todo 轮播图模块
// * 1. 图片组
const imgArr = [
{
key: 1,
src: “static/images/item1.jpeg”,
url: “https://php.cn“,
},
{
key: 2,
src: “static/images/item2.jpeg”,
url: “https://php.cn“,
},
{
key: 3,
src: “static/images/item3.jpeg”,
url: “https://php.cn“,
},
];
// * 2. 创建图片组
function createImgs(imgs) {
// 图片资源比较大,所以建议用文档片断来做
const frag = new DocumentFragment();
for (let i = 0; i < imgArr.length; i++) {
// 1. 创建图片元素
// const img = document.createElement(‘img’)
const img = new Image();
// 2. 添加属性// srcimg.src = imgArr[i].src;// data-keyimg.dataset.key = imgArr[i].key;// class='active': 第一张if (i === 0) img.classList.add("active");// 3. 添加事件img.onclick = () => (location.href = imgArr[i].url);// 添加图片分二步: 第一步加到内存中的文档片断元素上, 第二步再加到图片容器上// 4. 添加图片到片断中frag.append(img);
}
// 5. 将片断添加到图片容器元素中
imgs.append(frag);
}
// * 3. 创建按钮组
function createBtns(imgs, btns) {
// 计算出所有图片的数量,根据这个来创建相同数量的按钮
// console.log(imgs.childElementCount);
let length = imgs.childElementCount;
for (let i = 0; i < length; i++) {
// 1. 生成按钮: <span>
const btn = document.createElement(“span”);
// 2. 按钮索引: data-key, 必须与图片索引一致btn.dataset.key = imgs.children[i].dataset.key;// 3. 第1个按钮处于激活状态if (i === 0) btn.classList.add("active");// 4. 添加到容器中btns.append(btn);
}
}
// * 4. 按钮点击事件
function switchImg(btn, imgs) {
// 1. 去掉图片和按钮的激活状态
[…btn.parentNode.children].forEach((btn) => btn.classList.remove(“active”));
[…imgs.children].forEach((img) => img.classList.remove(“active”));
// 2. 将当前的按钮处于激活状态
btn.classList.add(“active”);
// 3. 根据按钮索引,找到对应的图片
const currImg = […imgs.children].find(function (img) {
return img.dataset.key == btn.dataset.key;
});
// const currImg = […imgs.children].find(img => img.dataset.key == btn.dataset.key);
// console.log(currImg);
// 4. 将当前图片处于激活状态(显示出来)
currImg.classList.add(“active”);
}
// * 5. 定时播放
function timePlay(btnArr, btnKeys) {
// 1. 头部取一个
let key = btnKeys.shift();
// 2. 根据索引找到对应的按钮,再给它自动派发一个点击事件
btnArr[key].dispatchEvent(new Event(“click”));
// 3. 把刚才到出的按钮再从尾部进入,实现首尾相连
btnKeys.push(key);
}
export { createImgs, createBtns, switchImg, timePlay };
···

