数组-JSON-ajax请求-跨域-jQuery
- 自选10个数组函数进行练习;
- 实例演示JSON二个函数,以及所有参数的功能;
- 熟练使用get,post发起ajax请求;
- 理解跨域的原理,并写出cors,jonp的源码并做出总结;
- 预习jQuery和Vue知识;
1. 自选10个数组函数进行练习
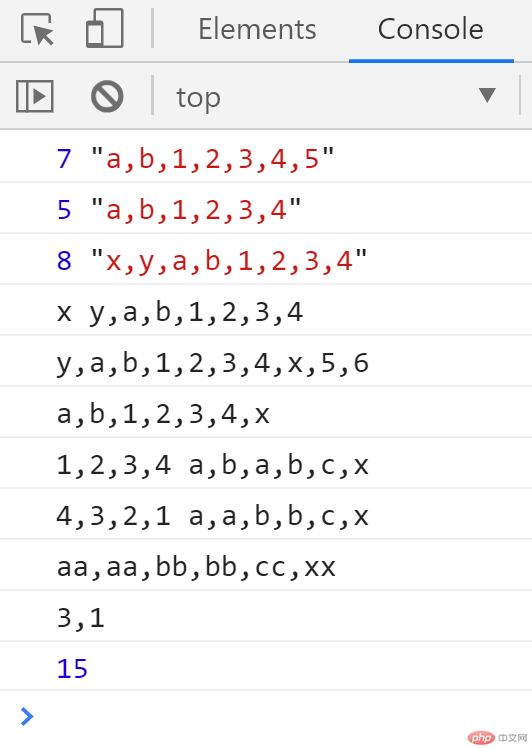
let res, arr = ['a', 'b', 1, 2, 3], obj;// 1. push 入栈|出栈// 入栈,数组尾部入栈// res = 入栈后元素总个数res = arr.push(4, 5);// 7 "a,b,1,2,3,4,5"console.log(res, arr.join());// 2. pop 出栈,数组后添加的元素弹出// res = 出栈的元素res = arr.pop();// 5 "a,b,1,2,3,4"console.log(res, arr.join());// 3. unshift 入队,数组头部入队// res = 入队后元素总个数res = arr.unshift('x', 'y');// 8 "x,y,a,b,1,2,3,4"console.log(res, arr.join());// 4. shift 出队,数组先添加的元素出队// res = 出队的元素res = arr.shift();// x y,a,b,1,2,3,4console.log(res, arr.join());// 5. concat 数组合并arr = arr.concat(['x', 5], 6);// y,a,b,1,2,3,4,x,5,6console.log(arr.join());// 6. slice 按位置截取数组arr = arr.slice(1, -2);// a,b,1,2,3,4,xconsole.log(arr.join());// 7. splice 从位置删除数量个数组,并插入新的元素填充删除的元素// res = 被删除的元素数组res = arr.splice(2, 4, 'a', ...['b','c']);// 1,2,3,4 a,b,a,b,c,xconsole.log(res.join(), arr.join());// 8. sort 排序// 数字倒序res.sort((a, b) => b - a);// 字母升序arr.sort();// 4,3,2,1 a,a,b,b,c,xconsole.log(res.join(), arr.join());// 9. map 遍历arr = arr.map(v => v + v);// aa,aa,bb,bb,cc,xxconsole.log(arr.join());// 10. filter 过滤res = res.filter(v => v % 2);// 返回奇数 3,1console.log(res.join());// 11. reduce 归内arr = [1, 2, 3, 4];res = arr.reduce((p, n) => p + n, 5);// 5为累加初始值,数组求和,返回 15console.log(res);
2. 实例演示JSON二个函数,以及所有参数的功能
- JSON.stringify 将 js 数据序列化为 json 字符串
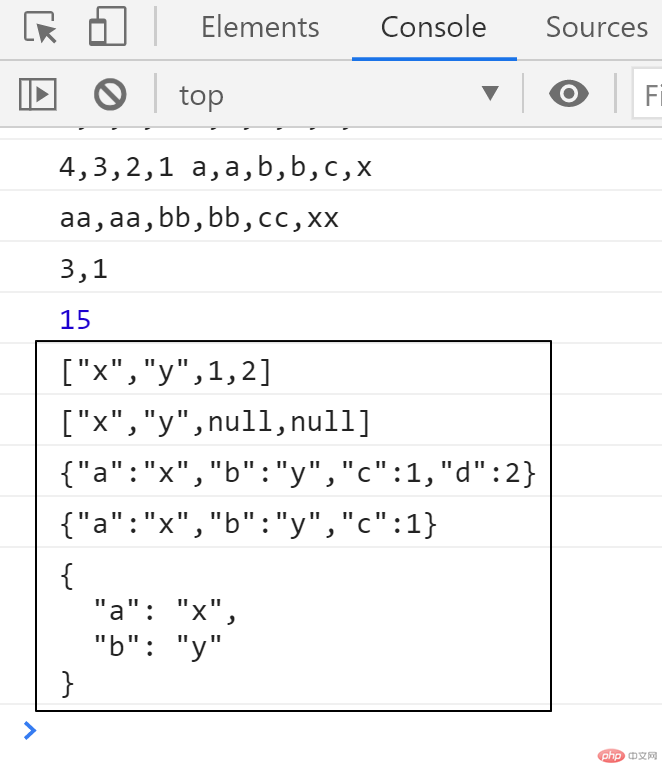
arr = ['x', 'y', 1, 2];obj = { a: 'x', b: 'y', c: 1, d: 2 };// 数组转 jsonjsonArr = JSON.stringify(arr);// ["x","y",1,2]console.log(jsonArr);// 函数排除数组键值从2开始的jsonArr1 = JSON.stringify(arr, (k, v) => {if (k > 1) return undefined;return v;});// ["x","y",null,null]console.log(jsonArr1);// 对象转 jsonjsonObj = JSON.stringify(obj);// {"a":"x","b":"y","c":1,"d":2}console.log(jsonObj);// 按索引保留键名 a, b, c 的jsonOjb1 = JSON.stringify(obj, ['a', 'b', 'c']);// {"a":"x","b":"y","c":1}console.log(jsonOjb1);// 函数排除键名是 c 和或值是 2 的jsonOjb2 = JSON.stringify(obj, (k, v) => {if (k === 'c' || v === 2) return undefined;return v;}, 2);// 返回// {// "a": "x",// "b": "y"// }console.log(jsonOjb2);
- JSON.parse 解析 json 字符串为 js 对象
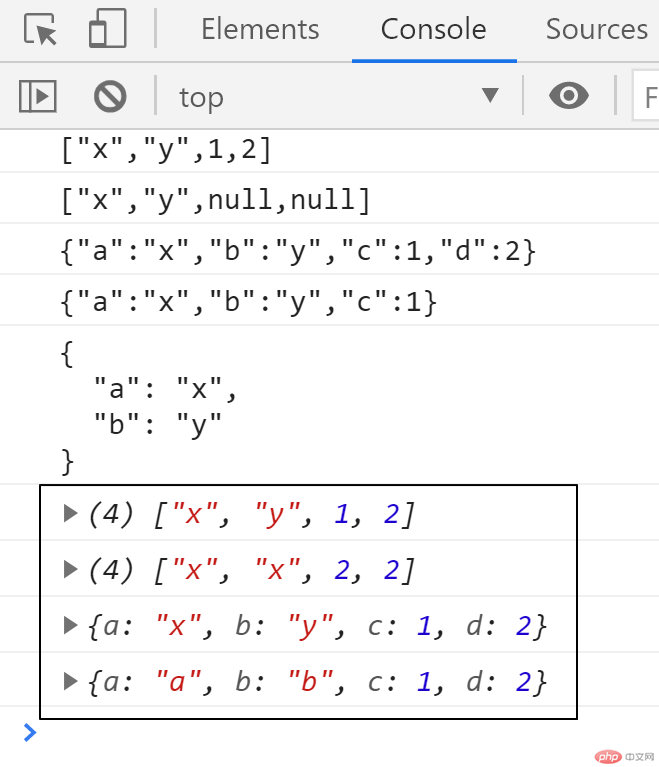
let json1 = `["x", "y", 1, 2]`;let json2 = `{"a": "x", "b": "y", "c": 1, "d": 2}`;let arr1 = JSON.parse(json1);// ["x", "y", 1, 2]console.log(arr1);let arr2 = JSON.parse(json1, (k, v) => {if (v === 1) return 2;if (v === 'y') return 'x';return v;});// ["x", "x", 2, 2]console.log(arr2);let obj1 = JSON.parse(json2);// {a: "x", b: "y", c: 1, d: 2}console.log(obj1);let obj2 = JSON.parse(json2, (k, v) => {if (k === 'a') return 'a';if (v === 'y') return 'b';return v;});// {a: "a", b: "b", c: 1, d: 2}console.log(obj2);
3. 熟练使用get,post发起ajax请求
head中添加 style 样式
<style>#form {width: 20em;margin: 2em auto;display: grid;grid-template-columns: 5em 1fr;gap: .5em;}#form>button,#form>.tips {grid-area: auto / 2;}</style>
body下添加 get|post 请求表单
<form action="" id="form"><label for="select">ID</label><select name="select" id="select"><option value="1" selected>1</option><option value="2">2</option><option value="3">3</option></select><button class="btn-get">ajax-get</button><p class="tips tipGet"></p><label for="email">email</label><input type="email" name="email" id="email" /><label for="password">password</label><input type="password" name="password" id="password" /><button class="btn-post">ajax-post</button><p class="tips tipPost"></p></form>
- 上面 form 表单后面,续写 js
<script>// form 表单const form = document.forms.namedItem('form');// get 按钮const btnGet = document.querySelector('.btn-get');// post 按钮const btnPost = document.querySelector('.btn-post');// get ajax 提示消息const tipGet = document.querySelector('.tipGet');// post ajax 提示消息const tipPost = document.querySelector('.tipPost');// get ajax 请求btnGet.onclick = ev => {// 阻止默认提交ev.preventDefault();// 创建对象const xhr = new XMLHttpRequest();// 配置参数xhr.open('get', 'ajax/test1.php?id='+ form.select.value);// 处理请求xhr.onload = () => {// json 格式数据解析为 js 对象let res = JSON.parse(xhr.response);tipGet.innerHTML = `${res.name} ( ${res.email} )`;};// 发送请求xhr.send(null);}// post ajax 请求btnPost.onclick = ev => {// 阻止默认提交ev.preventDefault();// 创建对象const xhr = new XMLHttpRequest();// 配置参数xhr.open('post', 'ajax/test2.php');// 处理请求xhr.onload = () => {// 输出提示字符串tipPost.innerHTML = `${xhr.response}`;};// 发送请求xhr.send(new FormData(form));}</script>
用于 get 请求的 ajax/test1.php 和 ajax/test2.php 是默认的
ajax/test1.php
<?php// 以二维数组模拟数据表信息$users = [['id'=>1, 'name'=>'天蓬','email'=>'tp@php.cn','password' => md5('123456')],['id'=>2, 'name'=>'灭绝','email'=>'mj@php.cn','password' => md5('abc123')],['id'=>3, 'name'=>'西门','email'=>'xm@php.cn','password' => md5('abc888')],];// 查询条件$id = $_GET['id'];// 在id组成的数组中查询是否存在指定的id,并返回对应的键名$key = array_search($id,array_column($users,'id'));// 根据键名返回指定的用户信息echo json_encode($users[$key]);
- ajax/test2.php
<?php// 使用二维数组模拟用户数据表信息$users = [['id'=>1, 'name'=>'天蓬','email'=>'tp@php.cn','password' => md5('123456')],['id'=>2, 'name'=>'灭绝','email'=>'mj@php.cn','password' => md5('abc123')],['id'=>3, 'name'=>'西门','email'=>'xm@php.cn','password' => md5('abc888')],];// 将通过post获取的数据保存到临时变量中$email = $_POST['email'];$password = md5($_POST['password']);// 使用数组过滤器查询是否存在指定的用户并返回结果$res = array_filter($users,function($user) use ($email,$password){return $user['email'] === $email && $user['password'] === $password;});// 将结果做为请求响应返回到前端echo count($res) === 1 ? '验证成功' : '验证失败';
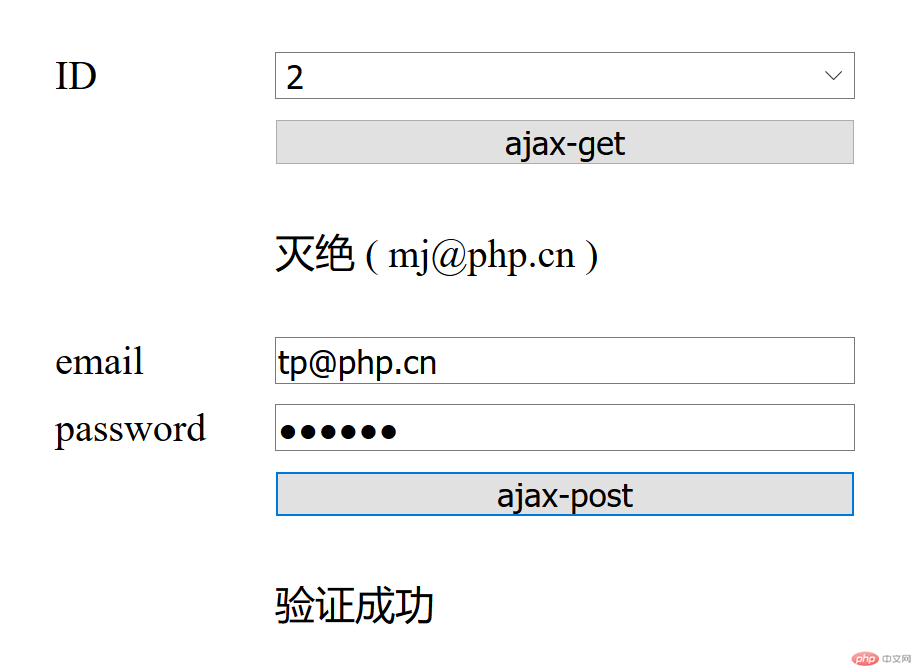
- 分别点击 ajax-get 和 ajax-post 按钮,分别发送 get 和 post 请求图
4. 理解跨域的原理,并写出cors,jonp的源码并做出总结
cors跨域:不同源的请求,跨协议|域名|端口的请求,需服务器端请求的文件开启跨域许可。
jsonp跨域:跨域标签实现,link 的 href,img 的 src,script 的 src ,a 标签的 href 等来实现。
- jsonp跨域,可以不需要服务器端请求的文件开启跨域许可。
- jsonp跨域,前端一个调用函数,把函数名告诉服务器端,服务器端把 json 格式数据填充进前端告诉它的函数名,进行动态输出。
4.1 cors跨域
- cors get 跨域,body 中添加代码
<!-- cors get 跨域请求 --><button class="btn-cors-get">cors-get-ajax</button><p class="cors-get-tip"></p><script>const btnCorsGet = document.querySelector('.btn-cors-get');const corsGetTip = document.querySelector('.cors-get-tip');btnCorsGet.onclick = ev => {let xhr = new XMLHttpRequest();xhr.open('get', 'http://wordpress/cors.php?cors=Get跨域');xhr.onload = () => {corsGetTip.innerHTML = xhr.response;}xhr.send();}</script>
- cors post 跨域,body 中添加代码
<!-- cors post 跨域请求 --><form action="" name="form2"><p><input type="text" name="text" value="post跨域"></p><button class="btn-cors-post">cors-post-ajax</button><p class="cors-post-tip"></p></form><script>const corsForm = document.forms.namedItem('form2');const btnCorsPost = document.querySelector('.btn-cors-post');const corsPostTip = document.querySelector('.cors-post-tip');btnCorsPost.onclick = ev => {ev.preventDefault();let xhr = new XMLHttpRequest();xhr.open('post', 'http://wordpress/cors.php');xhr.onload = () => {corsPostTip.innerHTML = xhr.response;}xhr.send(new FormData(corsForm));}</script>
<?phpheader('Access-Control-Allow-Origin: *');if (isset($_GET) && $_GET) print_r($_GET);if (isset($_POST) && $_POST) print_r($_POST);
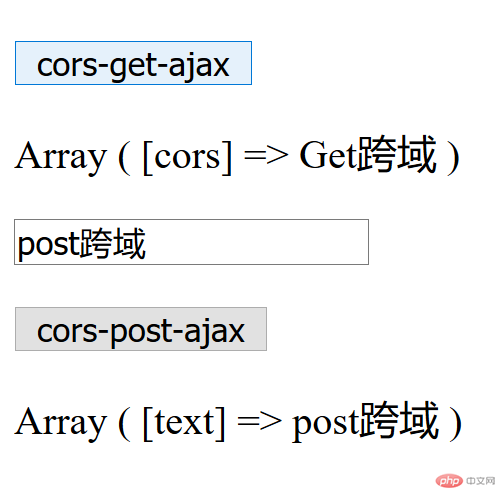
- 分别点击 cors-get-ajax 和 cors-post-ajax 返回结果图
4.2 jsonp跨域
<!-- jsonp 跨域请求 --><form action="" name="form3"><p><input type="text" name="qq" value="" placeholder="QQ"></p><button class="btn-qq">jsonp-qq</button><p class="qq-tip"></p></form><script>const qqForm = document.forms.namedItem('form3');const btnQq = document.querySelector('.btn-qq');const qqTip = document.querySelector('.qq-tip');// 构造函数function pt() {}// 原型方法pt.setHeader = function(data){qqTip.innerHTML = data[qqForm.qq.value];}// qq 头像请求路径// https://ptlogin2.qq.com/getface?appid=1006102&imgtype=3&uin=1000001// 服务器返回数据,像上面原型方法// pt.setHeader({"1000001":"https://thirdqq.qlogo.cn/g?b=sdk&k=UdD53CG0XibTPCJg5OPj5JQ&s=100&t=0"});btnQq.onclick = ev => {// 禁止默认提交ev.preventDefault();// 1. 动态生成一个允许跨域请求的html元素let script = document.createElement('script');// 2. 将跨域请求的url添加到src属性上script.src = 'https://ptlogin2.qq.com/getface?appid=1006102&imgtype=3&uin='+ qqForm.qq.value;// 3. 将script挂载到页面中document.body.insertBefore(script, document.body.firstElementChild);}</script>

