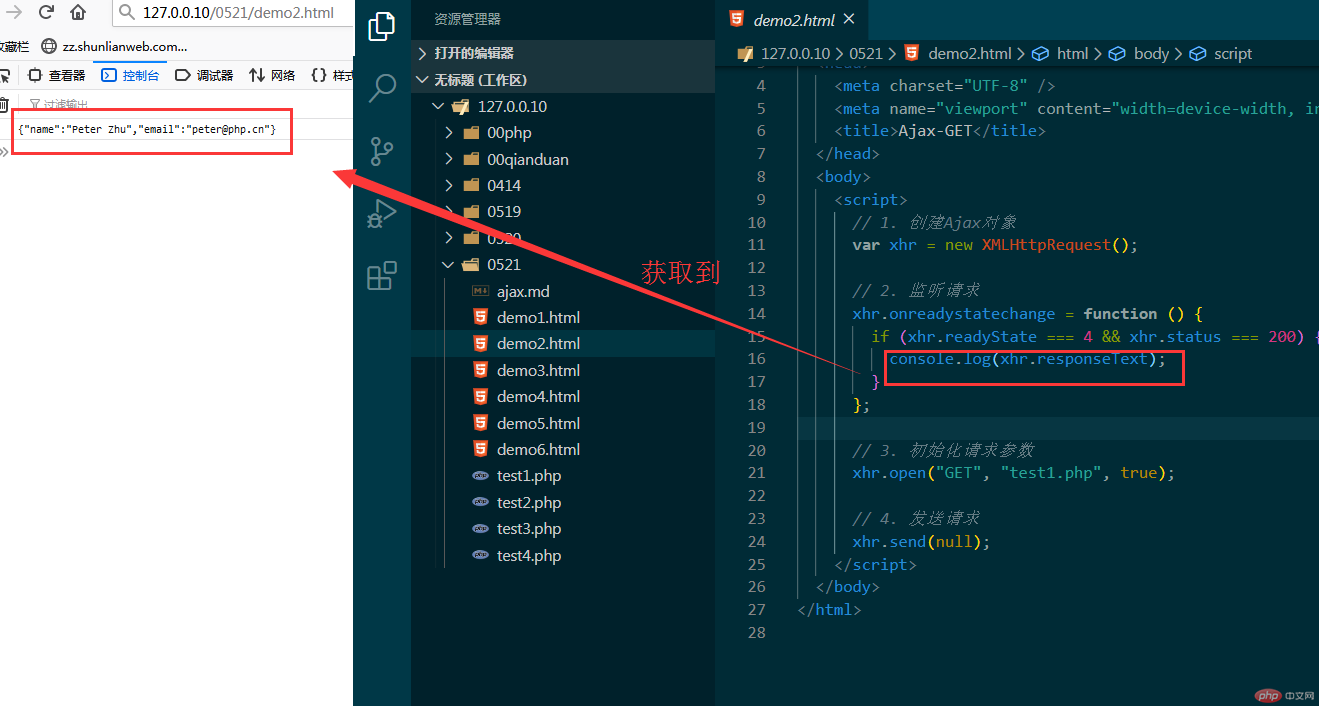
1.Ajax-GET
html代码:
<!DOCTYPE html><html lang="en"><head><meta charset="UTF-8" /><meta name="viewport" content="width=device-width, initial-scale=1.0" /><title>Ajax-GET</title></head><body><script>// 1. 创建Ajax对象var xhr = new XMLHttpRequest();// 2. 监听请求xhr.onreadystatechange = function () {if (xhr.readyState === 4 && xhr.status === 200) {console.log(xhr.responseText);}};// 3. 初始化请求参数xhr.open("GET", "test1.php", true);// 4. 发送请求xhr.send(null);</script></body></html>
php代码:
<?php$user['name'] = 'Peter Zhu';$user['email'] = 'peter@php.cn';// 将数组转为json字符串, 不能用retrun, 必须用打印语句,如echoecho json_encode($user);
图片:
2.Ajax-POST
html代码:
<!DOCTYPE html><html lang="en"><head><meta charset="UTF-8" /><meta name="viewport" content="width=device-width, initial-scale=1.0" /><title>Ajax-POST</title></head><body><script>// 1. 创建Ajax对象var xhr = new XMLHttpRequest();// 2. 监听请求xhr.onreadystatechange = function () {if (xhr.readyState === 4 && xhr.status === 200) {console.log(xhr.responseText);}};// 3. 初始化请求参数xhr.open("POST", "test2.php", true);// 4. 设置请求头,模拟表单类型的数组进行发送,application/x-www-form-urlencoded默认xhr.setRequestHeader("content-type", "application/x-www-form-urlencoded");var user = {email: "admin@php.cn",password: "123456",};// 将js对象转为jsonvar data = JSON.stringify(user);// 5. 发送请求xhr.send(data);</script></body></html>
php代码:
<?php// print_r($_POST);$data = key($_POST);// echo $data;// 将$data将为php可以处理的数据$user = json_decode($data);print_r($user);$user = json_decode($data, true);print_r($user);
效果1(是个对象):
效果2:
3.Ajax-POST-2
- 直接为json格式 需要设置utf-8
html代码:
<!DOCTYPE html><html lang="en"><head><meta charset="UTF-8" /><meta name="viewport" content="width=device-width, initial-scale=1.0" /><title>Ajax-POST-2</title></head><body><script>// 1. 创建Ajax对象var xhr = new XMLHttpRequest();// 2. 监听请求xhr.onreadystatechange = function () {if (xhr.readyState === 4 && xhr.status === 200) {console.log(xhr.responseText);}};// 3. 初始化请求参数xhr.open("POST", "test3.php", true);// 4. 设置请求头xhr.setRequestHeader("content-type", "application/json;charset=utf-8");var user = {email: "admin@php.cn",password: "123456",};// 将js对象转为jsonvar data = JSON.stringify(user);// 5. 发送请求xhr.send(data);</script></body></html>
php代码:
<?php// print_r($_POST);$data = file_get_contents('php://input');// // echo $data;// // 将$data将为php可以处理的数据$user = json_decode($data);print_r($user);$user = json_decode($data, true);print_r($user);
效果:
4.Ajax-POST-FormData
代码:
<!DOCTYPE html><html lang="en"><head><meta charset="UTF-8" /><meta name="viewport" content="width=device-width, initial-scale=1.0" /><title>Ajax-POST-FormData</title></head><body><script>// 1. 创建Ajax对象var xhr = new XMLHttpRequest();// 2. 监听请求xhr.onreadystatechange = function () {if (xhr.readyState === 4 && xhr.status === 200) {console.log(xhr.responseText);}};// 3. 初始化请求参数xhr.open("POST", "test4.php", true);// FormDatavar data = new FormData();data.append("name", "afgg3@qq.com");data.append("password", "afgg3@qq.com");// 5. 发送请求xhr.send(data);</script></body></html>
效果:
5.Ajax-POST-FormData登录验证
html代码:
<!DOCTYPE html><html lang="en"><head><meta charset="UTF-8" /><meta name="viewport" content="width=device-width, initial-scale=1.0" /><title>Ajax-POST-FormData登录验证</title></head><body><p>请登录</p><!-- onsubmit="return false": 禁用表单的默认提交,改为自定义的Ajax提交 --><formaction=""method="POST"style="display: grid; gap: 15px;"onsubmit="return false"><inputtype="email"name="email"placeholder="exam@email.com"requiredautofocus/><input type="password" name="password" placeholder="******" required /><button>提交</button></form><script>// 1. 获取表单和按钮var form = document.querySelector("form");var btn = document.querySelector("form button");// 2. 给按钮绑定点击事件,进行Ajax请求btn.onclick = function () {// 1. 创建Ajax对象var xhr = new XMLHttpRequest();// 2. 监听请求xhr.onreadystatechange = function () {if (xhr.readyState === 4 && xhr.status === 200) {console.log(xhr.responseText);// 将jsonl转js对象var res = JSON.parse(xhr.responseText);console.log(res);switch (res.status) {case 0:case 1:error = res.message;break;default:error = "未知错误";}// 将提示显示到表单中var span = document.createElement("span");span.innerHTML = error;span.style.color = "red";form.appendChild(span);}};// 3. 初始化请求参数xhr.open("POST", "test4.php", true);// FormDatavar data = new FormData(form);data.append("login_time", new Date().getTime());// 5. 发送请求xhr.send(data);};// 清除提示信息var inputs = document.querySelectorAll("input");for (var i = 0; i < inputs.length; i++) {inputs[i].oninput = function () {if (btn.nextElementSibling !== null)form.removeChild(btn.nextElementSibling);};}</script></body></html>
php代码:
<?php// print_r($_POST);$pdo = new PDO('mysql:host=localhost;dbname=php', 'root', '123456');$stmt = $pdo->prepare("SELECT COUNT(`id`) FROM `users` WHERE `name`=? AND `password`=? LIMIT 1");$stmt->execute([$_POST['name'], sha1($_POST['password'])]);$user = $stmt->fetch(PDO::FETCH_NUM);if ($user[0] == 1) echo json_encode(['status'=>1, 'message'=>'验证通过']);else echo json_encode(['status'=>0, 'message'=>'邮箱或密码错误']);
效果:一次错误一次正确:
总结:js不单单能配合html静态页面,配合php与服务器传输数据也是非常重要的,所以一定认真学习。

