作业一:
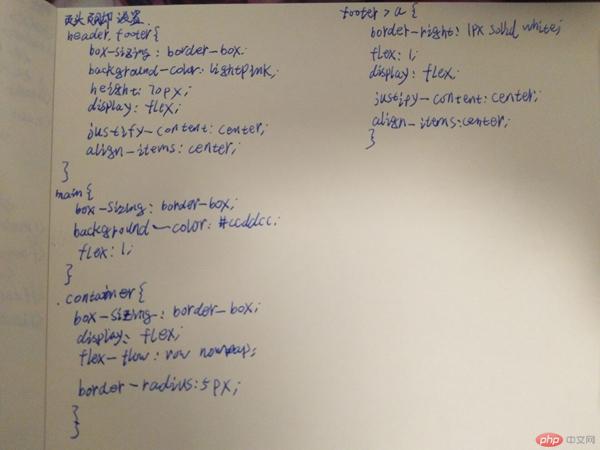
案例一 手机通用布局


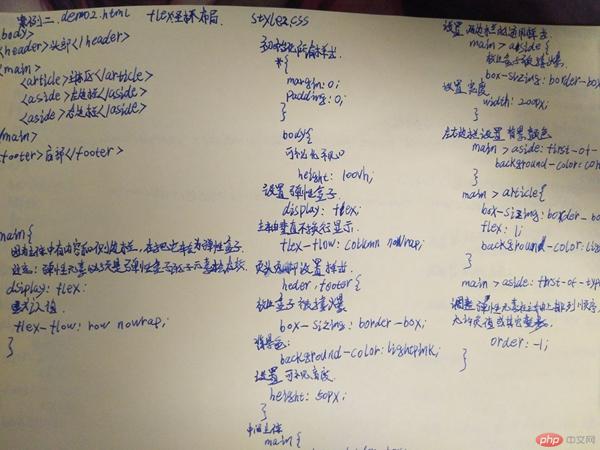
案例二 圣杯布局


<!DOCTYPE html>
<html lang="en">
<head>
    <meta charset="UTF-8">
    <title>弹性布局实现登录表单</title>
    <link rel="stylesheet" href="/shizhan/static/style3.css">
</head>
<body>
<div class="container">
    <h3>管理员登录</h3>
    <form action="">
        <div>
            <label for="password">邮箱:</label>
            <input type="password" id="password" name="password" placeholder="example@email.com">
        </div>

        <div>
            <label for="email">邮箱:</label>
            <input type="email" id="email" name="email" placeholder="example@email.com">
        </div>
        <div>
            <button>提交</button>
        </div>
    </form>
</div>

</body>
</html>

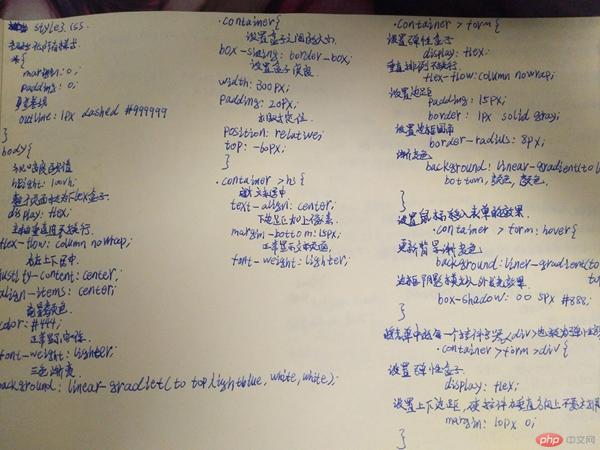
/*1、样式的重置*/

* {
    margin: 0;
    padding: 0;

    /*参考线*/
    /*outline: 1px dashed #999999;*/

}

body {
    /*视口高度百分值*/
    height: 100vh;
    /*整个页面转为Flex盒子*/
    display: flex;
    /*主轴垂直且不换行*/
    flex-flow: column nowrap;
    /*左右上下居中*/
    justify-content: center;
    align-items: center;

    color:#444;
    /*正常显示字体*/
    font-weight: lighter;

    /*三色渐变*/
    background: linear-gradient(to top,lightblue,white,skyblue);
}

.container{
    /*设置盒子之间的大小*/
    box-sizing: border-box;
    /*设置盒子宽度*/
    width: 300px;
    padding: 20px;

    /*相对定位*/
    position: relative;
    top:-60px;
}

.container > h3{
    /*文本居中*/
    text-align: center;
    /*下边距加上像素*/
    margin-bottom: 15px;
    /*正常显示文本页面*/
    font-weight: lighter;
}

.container > form{
    /*设置弹性容器*/
    display: flex;
    /*垂直排列不换行*/
    flex-flow: column nowrap;

    /*设置边距*/
    padding: 15px;
    border: 1px solid gray;
    /*设置边框圆角*/
    border-radius: 8px;
    /*渐变色*/
    background: linear-gradient(to left bottom,lemonchiffon,lightseagreen);

}

/*鼠标放入登录框时会发光 0 0 5px, 或者是阴影*/
.container > form:hover{
    background: linear-gradient(to right top,mediumvioletred,lightcoral);
    box-shadow: 10px 10px 8px #888;
}
.container > form > div{
    /*设置外边距*/
    margin: 10px 0;
    /*设置弹性容器*/
    display: flex;

}


.container > form > div > input{
    /*将剩余空间全部分配给input,设置元素因子*/
    flex: 1;
    /*不要与label贴的太近*/
    margin-left: 10px;
    /*文本框中的提示文本,不要离边框太近,稍微向右一些*/
    padding-left: 6px;

    /*设置输入框的样式,使之看上去更酷一些,与整个表单风格一致*/
    border: 1px solid #888;
    border-radius: 5px;

}

.container > form > div > button{
    /*将剩余全部空间分配该按钮, 使按钮与容器等宽*/
    flex: 1;
    /*加点样式*/
    background-color: lightseagreen;
    color: white;
    /*使按钮更高一些*/
    height: 24px;
    /*设置字间距, 不要使用超级无敌大空格,让代码逼格更高*/
    letter-spacing: 15px;

    /*重置按钮边框,先去掉之前的样式*/
    border: none;
    /*设置按钮圆角*/
    border-radius: 8px;

}

/*移入效果*/
.container > form > div > button:hover{
    /*加入按钮背景颜色*/
    background-color: lightsalmon;
    /*边框阴影模拟外放光效果*/
    box-shadow: #3a87ad;
}
案例三 管理员登录


作业二


总结
1、进过三个案例之后,对弹性布局盒子理解更深,虽然不能像老师那样随便出书就是精美的页面,坚持下去一定能做出属于自己的页面的!
2、对也主体区内容布局还是不能很好的掌握,只要掌握方法,坚持下去肯定会有收获的!基本上能够看懂很多的样式了。
3、display: flex 设置弹性和盒子、flex-flow: row no wrap 设置弹性流 以及水平方向 换行 column nowrap 主轴垂直方向
4、跟着老师做的管理员登录页面还是非常开心的,同时晚来的作业很抱歉!

