作业
demo1
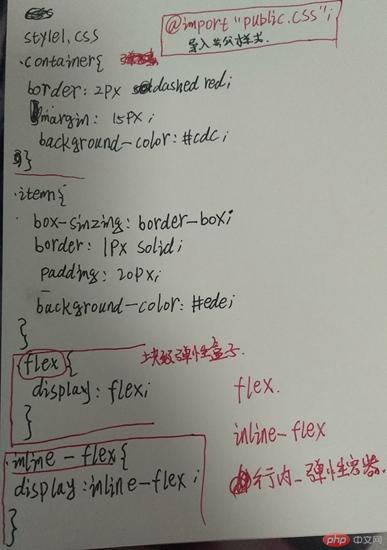
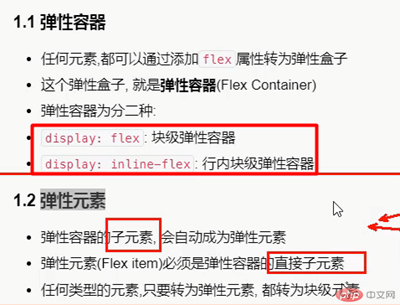
弹性容器盒子样式设置
display: flex 、 inline-flex

demo2 案例简单导航
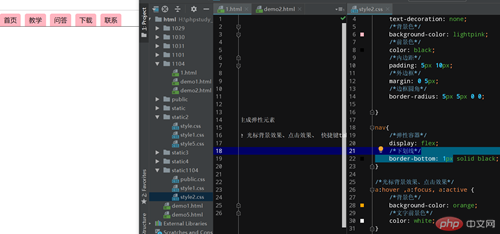
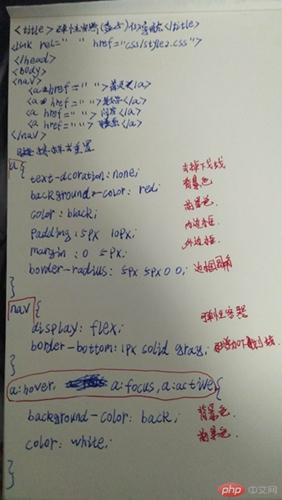
加背景颜色、去除下划线、加下划线和光标样式
demo3

demo4
轮廓线
outlion 轮廓线的使用
button 提交按钮


<!DOCTYPE html>
<html lang="en">
<head>
    <meta charset="UTF-8">
    <title>创建网站首页</title>
    <link rel="stylesheet" href="/static1104/style4.css">
</head>
<body>
<header>
    <h1>大侠博客生涯</h1>
</header>
<!--导航-->
<nav>
    <a href="">首页</a>
    <a href="">教学</a>
    <a href="">娱乐</a>
    <a href="">联系我们</a>
</nav>
<main>
    <article>
        <img src="/static1104/images/1.jpg" alt="">
        <p>这是我的全新动力技术表现</p>
        <button>学习</button>
    </article>
    <article>
        <img src="/static1104/images/2.jpg" alt="">
        <p>全新技术点击就能阅读,全新动力技术表现,全新动力技术表现,全新动力技术表现</p>
    </article>
    <article>
        <img src="/static1104/images/3.jpg" alt="">
        <p>全新动力技术表现,全新动力技术表现,全新动力技术表现,全新动力技术表现,全新动力技术表现,全新动力技术表现</p>
    </article>
</main>
<!--页脚-->
<footer>
    <p>copright © 2019 -2021</p>
</footer>
</body>
</html>@import "style2.css";

* {
    /*给所有的元素添加轮廓线*/
    /*outline: 1px solid #ccc;*/

    margin: 10px;
    padding: 10px;
}
/*将页面所有的元素全部转为弹性盒子 flex*/
body, nav, main, article{
    display: flex;
}
/*元素在主轴上的排列方向*/
body, article{
    /*垂直排列*/
    flex-direction: column;

}
footer{
    /*上外边距*/
    border-top: 1px solid #ccc;

}
nav{
    padding-bottom: 0;
}
demo5
元素自动缩小或者是溢出
nowrap: wrap: wrap-reverse
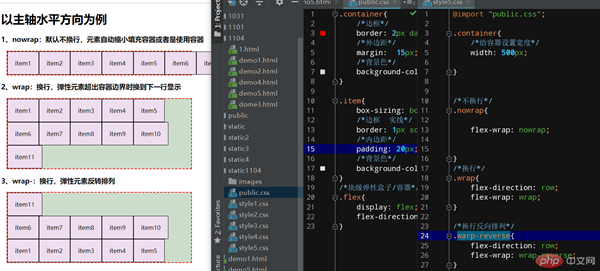
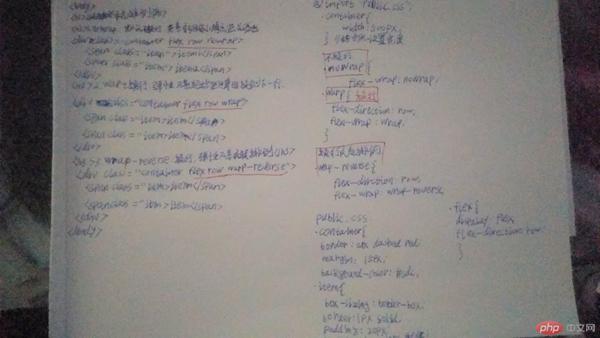
.container{
    /*边框*/
    border: 2px dashed red;
    /*外边距*/
    margin:  15px;
    /*背景色*/
    background-color: #cdc;
}

.item{
    box-sizing: border-box;
    /*边框  实线*/
    border: 1px solid;
    /*内边距*/
    padding: 20px;
    /*背景色*/
    background-color: #ede;
}
/*块级弹性盒子/容器*/
.flex{
    display: flex;
    flex-direction: row;
}
@import "public.css";

.container{
    /*给容器设置宽度*/
    width: 500px;
}
/*不换行*/
.nowrap{

    flex-wrap: nowrap;
}
/*换行*/
.wrap{
    flex-direction: row;
    flex-wrap: wrap;
}
/*换行反向排列*/
.warp-reverse{
    flex-direction: row;
    flex-wrap: wrap-reverse;
}
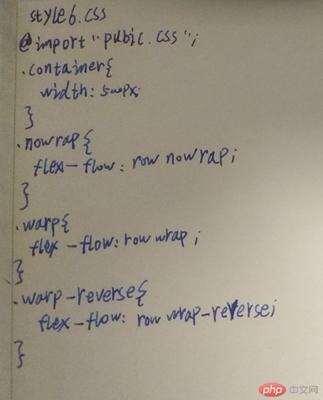
demo6
弹性流 flex-flow 让代码更加简洁
demo7
单行和多行的作用
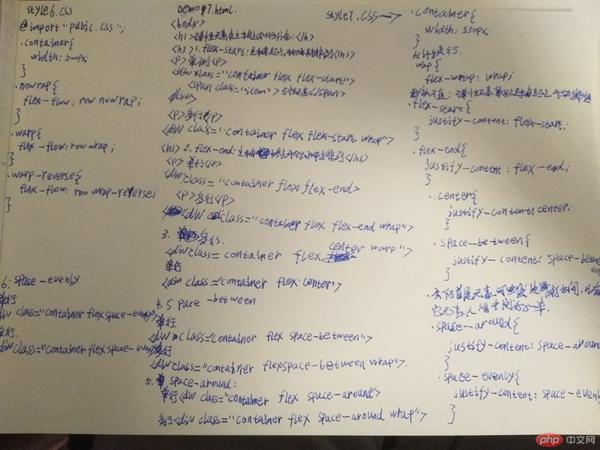

@import "public.css";

/*为直观看到溢出效果,这里人为设置容器宽度边界*/
/*默认*/
.container {
    width: 550px;
}

/*允许换行*/
.wrap {
    flex-wrap: wrap;
}

/*默认值:弹性元素紧贴主轴起点开始排列*/
.flex-start {
    justify-content: flex-start;
}

.flex-end {
    justify-content: flex-end;
}

.center {
    justify-content: center;
}

.space-between {
    justify-content: space-between;
}

/*会千万首尾元素与容器边界的空间,只有其它元素之间空间的一半*/
.space-around {
    justify-content: space-around;
}

.space-evenly {
    justify-content: space-evenly;
}
demo8
在显示效果时会有缓存, 需要清除
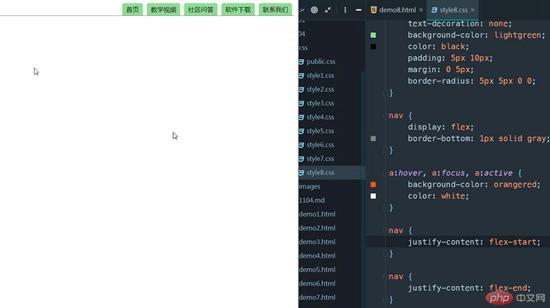
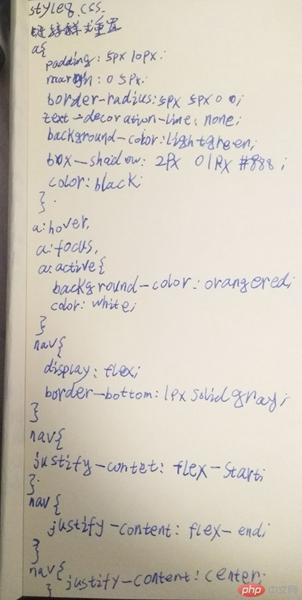
/*链接样式重置*/
a {
    padding: 5px 10px;
    margin: 0 5px;
    border-radius: 5px 5px 0 0;
    text-decoration-line: none;
    background-color: lightgreen;
    box-shadow: 2px 0 1px #888;
    color: black;
}

a:hover,
/*tab切换进也会激活*/
a:focus,
a:active {
    background-color: orangered;
    color: white;
}
nav {
    display: flex;
    border-bottom: 1px solid gray;
}
/*将导航放在主轴的任意位置上*/
nav {
    justify-content: flex-start;
}
nav {
    justify-content: flex-end;
}
nav {
    justify-content: center;
}
demo9
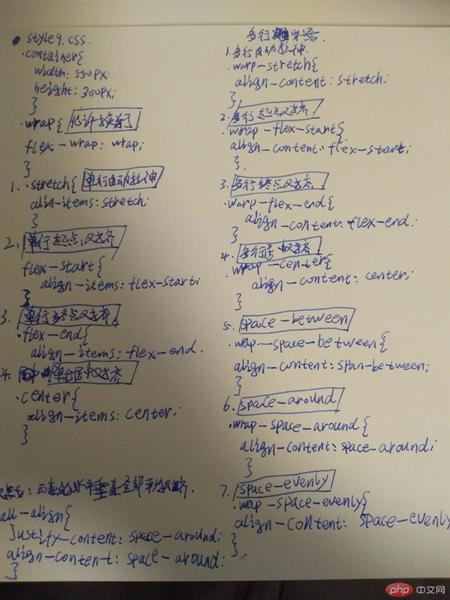
@import "public.css";
.container {
    width: 550px;
    height: 300px;
}
/*允许换行*/
.wrap {
    flex-wrap: wrap;
}
/************ 单行容器 ************/

/*1. 单行自动拉伸*/
.stretch {
    align-items: stretch;

}
/*2. 单行起点对齐*/
.flex-start {
    align-items: flex-start;
}
/*3. 单行终点对齐*/
.flex-end {
    align-items: flex-end;
}
/*4. 单行居中对齐*/
.center {
    align-items: center;
}
/************ 多行容器 ************/

/*1. 多行自动拉伸*/
.wrap-stretch {
    /*每一行的对齐方式*/
    align-content: stretch;
}
/*2. 多行起点对齐*/
.wrap-flex-start {
    align-content: flex-start;
}
/*3. 多行终点对齐*/
.wrap-flex-end {
    align-content: flex-end;
}
/* 4. 多行居中对齐 */
.wrap-center {QQ
    align-content: center;
}
/*5. space-between*/
.wrap-space-between {
    align-content: space-between;
}
/*6. space-around*/
.wrap-space-around {
    align-content: space-around;
}
/*7. space-evenly*/
.wrap-space-evenly {
    align-content: space-evenly;
}
/*实战: 元素的水平垂直全部平均对齐*/
.all-align {
    justify-content: space-around;
    align-content: space-around;
}
总结:
使用技巧
1、span.item{item$}*3
2、弹性元素必须是直接子元素,才能生成弹性元素
3、a:hover ,a:focus, a:active 光标背景效果、点击效果、 快捷键tab样式
4、outlion:1px solid #ccc;轮廓线 button 提交按钮
弹性流
flex-flow 能够减少代码的重复
在完成的作业之后对弹性盒子有更深的了解
最大的感悟就是
当天的事当天做完 如果堆积很麻烦

