实例
<!DOCTYPE html>
<html lang="en">
<head>
    <meta charset="UTF-8">
    <title>外边距margin</title>
    <link rel="stylesheet" href="static/css/style3.css">
</head>
<body>
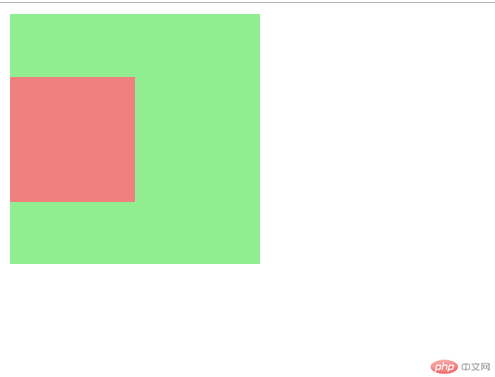
<!--同级塌陷:两个同级元素 只有上下才会塌陷-->
<!--<div class="box1"></div>-->
<!--<div class="box2"></div>-->
<!--嵌套传递-->
    <!--<div class="box3">-->
        <!--<div class="box4"></div>-->
    <!--</div>-->
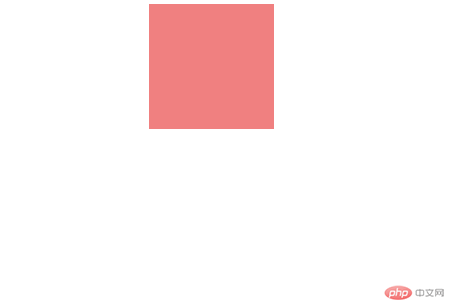
<!--自动挤压-->
    <div class="box5"></div>

</body>
</html>
实例
/*同级塌陷*/
.box1{
    width: 100px;
    height: 100px;
    background-color: lightgreen;
}
.box2{
    width: 100px;
    height: 100px;
    background-color: lightcoral;
}
/*box1添加一个下外边距:margin-boottom*/
.box1{
    margin-bottom: 30px;
}
.box2{
    margin-top: 30px;
}
/*嵌套传递*/
.box3{
    width: 200px;
    height: 200px;
    background-color: lightgreen;
}
.box4{
    width: 100px;
    height: 100px;
    background-color: lightcoral;
}
.box4{
    margin-top: 0px;
}
.box3{
    padding-top: 50px;
    height: 150px;
}
/*自动挤压*/
.box5{
    width: 100px;
    height: 100px;
    background-color: lightcoral;

    /*margin-left: auto;*/
    /*margin-right: auto;*/
    margin: auto;

}
运行实例 »
点击 "运行实例" 按钮查看在线实例
同级塌陷 嵌套传递
![1563103133808511.png }LR9]S}062O@W]Z6CM)5(SB.png](https://img.php.cn/upload/image/348/932/231/1563103133808511.png)
自动挤压
实例
<!DOCTYPE html>
<html lang="en">
<head>
    <meta charset="UTF-8">
    <title>内边距padding</title>
    <link rel="stylesheet" href="static/css/style2.css">
</head>
<body>
<!--将图片居中显示-->
    <div class="box1">
        <img src="static/image/girl.jpg" alt="小姐姐" width="200px">
    </div>
<hr>
<!--宽度分离-->
<div class="wrap">
    <div class="box2">
        <img src="static/image/girl.jpg" alt="小姐姐" width="200px">
    </div>
</div>
<hr>
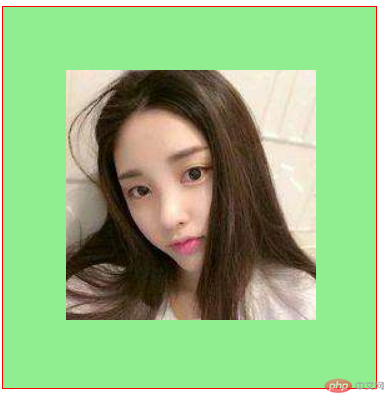
<!--box-sizing-->
    <div class="box3">
        <img src="static/image/girl.jpg" alt="小姐姐" width="200px">
    </div>
</body>
</html>
实例
/*第一种方式*/
.box1{
    width: 300px;
    height: 300px;
    background-color: lightgreen;
    border: black 1px solid;
}
.box1{
    padding: 50px;
}
.box1{
    width: 200px;
    height: 200px;
}

/*第二种方式(常用的)*/
/*宽度分离:利用了嵌套盒子之间,只有宽度可以继承的特征*/
.wrap{
    width: 300px;
}
.box2{
    /*width: 300px;*/
    /*height: 300px;*/
    background-color: yellow;
    border: black 1px solid;
    padding: 50px;
}
/*第三种方式*/
.box3{
    width: 300px;
    /*降父盒子的宽度作用到边框上而不是内容上*/
    box-sizing: border-box;
    background-color: lightgreen;
    border: red 1px solid;
    padding: 50px;
}
运行实例 »
点击 "运行实例" 按钮查看在线实例
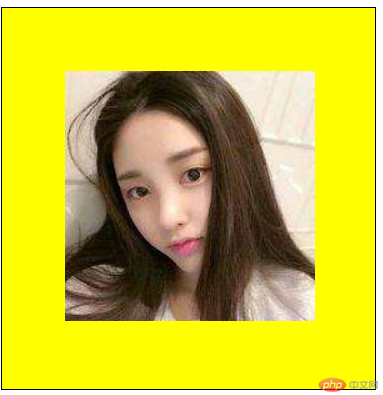
![1563103728584592.png XL}478`~P)~P4]4)BZX9`F6.png](https://img.php.cn/upload/image/644/475/783/1563103728584592.png)
浮动的实现原理与清除的技巧
实例
<!DOCTYPE html>
<html lang="en">
<head>
    <meta charset="UTF-8">
    <title>浮动float</title>
    <link rel="stylesheet" href="static/css/style6.css">
</head>
<body>
<!--文档流:html元素默认按照书写的顺序在浏览器中,遵循从左到右,再从上到下进行排列
脱离文档流
布局的前提:通常先将元素东文档流中脱离,这样才能随心所欲的操作
元素脱离文档流的手段:浮动和绝对定位

-->
    <div class="box1"></div>
    <div class="box2"></div>
    <div class="box3"></div>
    <div class="box4"></div>
</body>
</html>
实例
.box1 {
    width: 150px;
    height: 150px;
    background-color: lightblue;

}

.box2 {
    width: 180px;
    height: 180px;
    background-color: lightcoral;
}
.box1{
    /*左浮动:脱离文档流*/
    float: left;
}
.box2{
    float: left;
}
.box3 {
    width: 200px;
    height: 200px;
    background-color: lawngreen;
}
.box3{
    float: right;
}
.box4{
    width: 100%;
    height: 300px;
    background-color: gray;
}
.box4{
    /*clear: left;*/
    /*clear: right;*/
    clear: both;
}
运行实例 »
点击 "运行实例" 按钮查看在线实例


相对定位与绝对定位的区别
实例
<!DOCTYPE html>
<html lang="en">
<head>
    <meta charset="UTF-8">
    <title>定位与相对定位</title>
    <link rel="stylesheet" href="static/css/style7.css">
</head>
<body>
<!--
        定位:将元素在页面中重新排列,分为四类
        1.静态定位: 浏览器默认方式, 即文档流中的位置
        2.相对定位relative: 元素并未脱离文档流,只是相对于它原来的位置,做相对移动
        3.绝对定位: 元素脱离文档流重新排列,不论元素之前是什么类型,全部转为块元素,支持宽高
        4.固定定位: 始终相对于浏览器的窗口做为定位父级,进行定位
     -->
<!--<div style="width: 100px;height: 100px;background-color: red;position: relative;top: 50px;left: 30px"></div>-->
        <div class="box1"></div>
        <div class="box2"></div>
        <div class="box3"></div>
        <div class="box4"></div>
        <div class="box5"></div>
</body>
</html>
实例
.box1{
    width: 200px;
    height: 200px;
    background-color: lawngreen;
}
.box2{
    width: 200px;
    height: 200px;
    background-color: black;
}
.box3{
    width: 200px;
    height: 200px;
    background-color: lightblue;
}
.box4{
    width: 200px;
    height: 200px;
    background-color: red;
}
.box5{
    width: 200px;
    height: 200px;
    background-color: yellow;
}
.box1{
    position: relative;
    left: 200px;
}
.box3{
    position: relative;
    left: 200px;
    top: -200px;
}
.box4{
    position: relative;
    top: -200px;
    left: 200px;
}
.box5{
    position: relative;
    left: 400px;
    top: -600px;
}
运行实例 »
点击 "运行实例" 按钮查看在线实例
![1563104250403608.png KD{5GA6IJ31{WS}RZK]G$66.png](https://img.php.cn/upload/image/821/288/306/1563104250403608.png)
遮罩+绝对定位)和固定定位广告
实例
<!DOCTYPE html>
<html lang="en">
<head>
    <meta charset="UTF-8">
    <link rel="stylesheet" href="static/css/style4.css">
    <title>绝对定位之遮罩(shade)</title>
</head>
<body>
<!-- 模拟php中文网的登录页面 -->
<div class="shade"></div>
<div class="login"><img src="static/image/login.jpg" alt="" ></div>
</body>
</html>
实例
body{
    margin: 0;
    background-image: url("../image/php.jpg");
    /*尺寸或者平铺方式*/
    background-size: cover;
    background-repeat: no-repeat;
}
.shade{
    position: absolute;
    left: 0;
    top: 0;
    width: 100%;
    height: 100%;
    background-color: black;
    /*遮罩*/
    opacity: 0.7;
}
.login img{
    width: 300px;
    height: 400px;
}
.login{
    background-color: white;
    position: absolute;
    left: 50%;
    top: 50%;
    top: 50%;
    margin-left: -150px;
    margin-top: -200px;
}
运行实例 »
点击 "运行实例" 按钮查看在线实例
![1563104535812857.png 1`FZ[LJ@@{C(`~Z$NX69T]R.png](https://img.php.cn/upload/image/420/725/807/1563104535812857.png)
实例
<!DOCTYPE html>
<html lang="en">
<head>
    <meta charset="UTF-8">
    <title>固定定位</title>
    <link rel="stylesheet" href="static/css/style5.css">
</head>
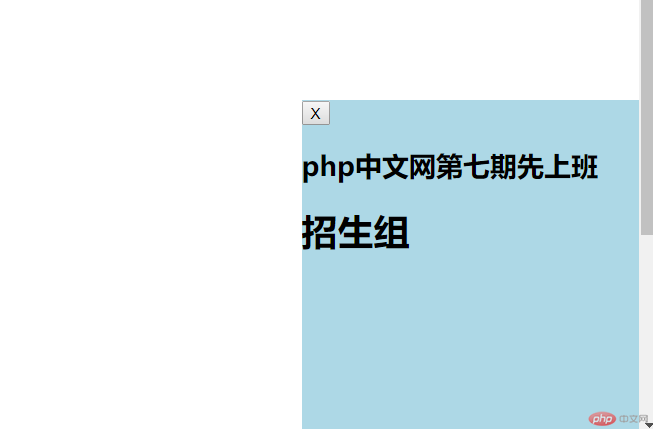
<body>
    <div class="ads">
        <button onclick="this.parentNode.style.display='none'">X</button>
        <h2>php中文网第七期先上班</h2>
        <h1>招生组</h1>

    </div>
</body>
</html>
实例
body{
    height: 1000px;

}
.ads{
    width: 300px;
    height: 300px;
    background-color: lightblue;
    /*固定定位,相对于<body>*/
    position: fixed;
    right: 0;
    bottom: 0;
}
运行实例 »
点击 "运行实例" 按钮查看在线实例
