
JavaScript:演示Ajax的get和post请求,练习选顶卡和换肤案例
Ajax 异步请求
特别提示: 异步请求不要使用
live server插件,必须创建一个本地服务器环境
1. 同步与异步
以前端请求,后端响应为例
- 同步: 前端发请求, 必须等到后端响应完成,才允许发送另一个请求
- 异步: 前端发请求后不等待后端响应结果继续执行,后端响应完成通过事件通知前端处理
2. XMLHttpRequest 对象
XMLHttpRequest是浏览器对象,而非 JS 内置对象
2.1 xhr 请求步骤
- 创建 xhr 对象:
const xhr = new XMLHttpRequest() - 配置 xhr 参数:
xhr.open(type, url) - 处理 xhr 响应:
xhr.onload = (...) => {...} - 发送 xhr 请求:
xhr.send(...)
2.2. xhr 对象常用属性
| 序号 | 方法 | 描述 |
|---|---|---|
| 1 | responseType |
设置响应类型 |
| 2 | response |
响应正文 |
2.3 xhr 对象常用方法
| 序号 | 方法 | 描述 |
|---|---|---|
| 1 | open(type,url) |
配置请求参数 |
| 2 | send(data/null) |
发送请求 |
2.4. xhr 对象常用事件
| 序号 | 事件 | 描述 |
|---|---|---|
| 1 | load() |
请求成功 |
| 2 | error() |
请求失败 |
3. FormData 对象
FormData是表单数据构造器
| 序号 | 方法 | 描述 |
|---|---|---|
| 1 | append(name,value) |
请求成功 |
| 2 | delete(name) |
请求失败 |
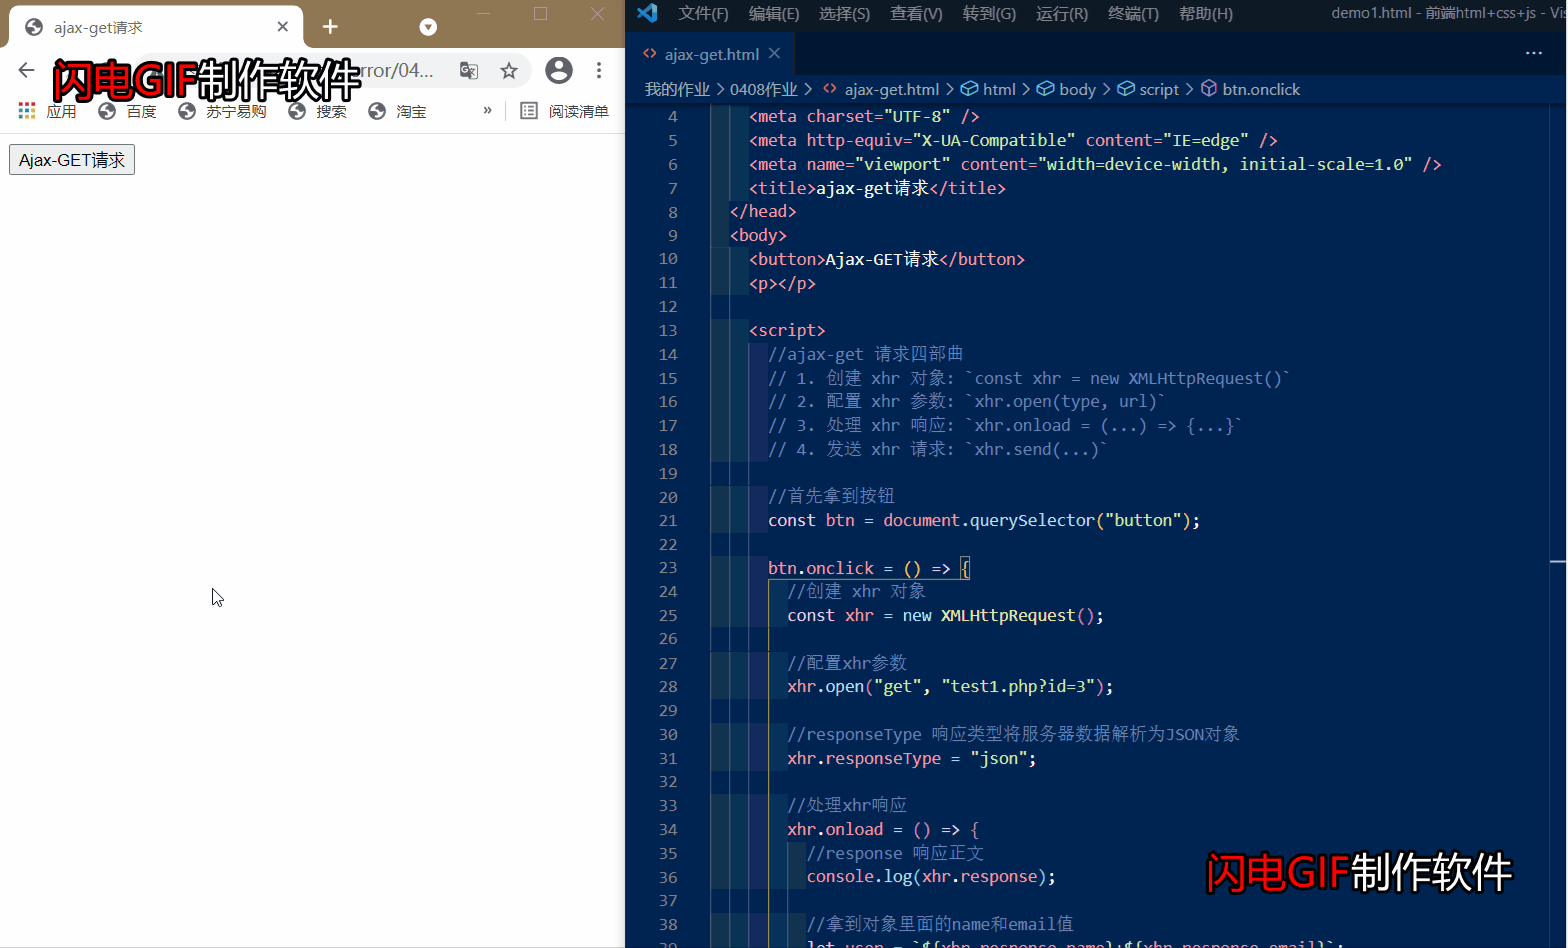
一.Ajax-GET请求
代码块
<!DOCTYPE html><html lang="en"><head><meta charset="UTF-8" /><meta http-equiv="X-UA-Compatible" content="IE=edge" /><meta name="viewport" content="width=device-width, initial-scale=1.0" /><title>ajax-get请求</title></head><body><button>Ajax-GET请求</button><p></p><script>//ajax-get 请求四部曲// 1. 创建 xhr 对象: `const xhr = new XMLHttpRequest()`// 2. 配置 xhr 参数: `xhr.open(type, url)`// 3. 处理 xhr 响应: `xhr.onload = (...) => {...}`// 4. 发送 xhr 请求: `xhr.send(...)`//首先拿到按钮const btn = document.querySelector("button");btn.onclick = () => {//创建 xhr 对象const xhr = new XMLHttpRequest();//配置xhr参数xhr.open("get", "test1.php?id=3");//responseType 响应类型将服务器数据解析为JSON对象xhr.responseType = "json";//处理xhr响应xhr.onload = () => {//response 响应正文console.log(xhr.response);//拿到对象里面的name和email值let user = `${xhr.response.name}+${xhr.response.email}`;//拿到p标签,把值传到p标签里面去let p = document.querySelector("p");p.textContent = user;};//发送xhr请求xhr.send(null);};</script></body></html>
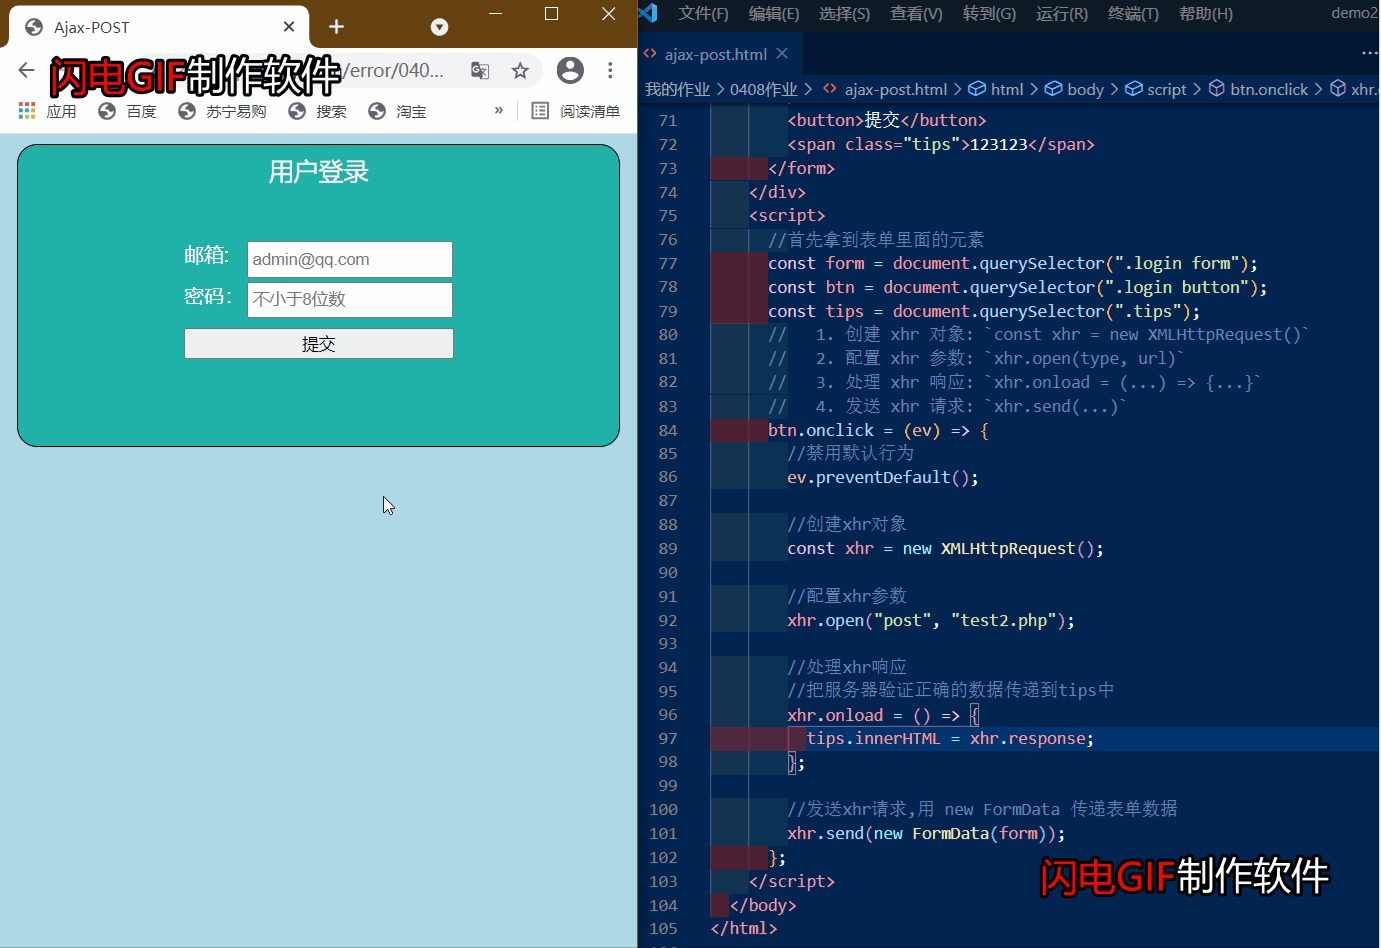
二.Ajax-POST请求
代码块
<!DOCTYPE html><html lang="en"><head><meta charset="UTF-8" /><meta http-equiv="X-UA-Compatible" content="IE=edge" /><meta name="viewport" content="width=device-width, initial-scale=1.0" /><title>Ajax-POST</title><style>:root {background-color: lightblue;}.login {display: grid;grid-template-columns: 1fr;grid-template-rows: 40px 1fr;place-items: center;border: 1px solid;width: 30rem;height: 15rem;margin: auto;background-color: lightseagreen;border-radius: 1rem;}.login > p {color: white;font-size: 20px;}.login > form > label {color: white;}.login > form {display: grid;grid-template-columns: repeat(1, 3rem 1fr);grid-template-rows: repeat(4, 1fr);gap: 3px;padding: 1rem;}.login > form > button {margin-top: 5px;width: 13.5rem;}.login > form > .tips {place-items: center;grid-area: 4 / 2;color: white;margin-top: 0.5rem;}</style></head><body><div class="login"><p>用户登录</p><form action=""><label for="email">邮箱:</label><inputtype="email"name="email"id="email"placeholder="admin@qq.com"/><label for="password">密码:</label><inputtype="password"name="password"id="password"placeholder="不小于8位数"minlength="8"maxlength="14"/><button>提交</button><span class="tips">123123</span></form></div><script>//首先拿到表单里面的元素const form = document.querySelector(".login form");const btn = document.querySelector(".login button");const tips = document.querySelector(".tips");// 1. 创建 xhr 对象: `const xhr = new XMLHttpRequest()`// 2. 配置 xhr 参数: `xhr.open(type, url)`// 3. 处理 xhr 响应: `xhr.onload = (...) => {...}`// 4. 发送 xhr 请求: `xhr.send(...)`btn.onclick = (ev) => {//禁用默认行为ev.preventDefault();//创建xhr对象const xhr = new XMLHttpRequest();//配置xhr参数xhr.open("post", "test2.php");//处理xhr响应//把服务器验证正确的数据传递到tips中xhr.onload = () => {tips.innerHTML = xhr.response;};//发送xhr请求,用 new FormData 传递表单数据xhr.send(new FormData(form));};</script></body></html>
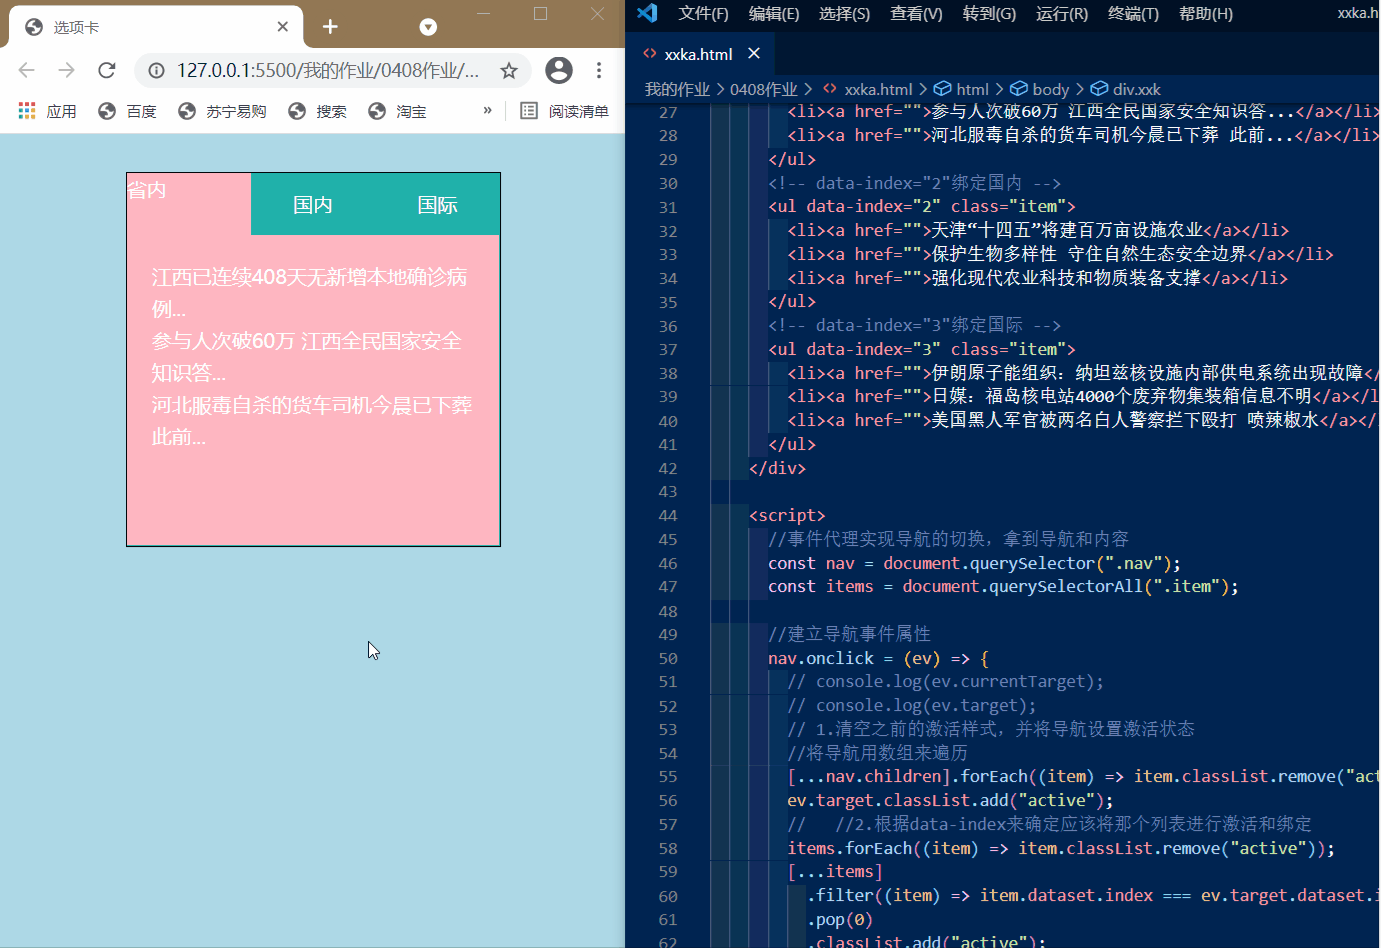
三.选项卡案例
html代码块
<!DOCTYPE html><html lang="en"><head><meta charset="UTF-8" /><meta http-equiv="X-UA-Compatible" content="IE=edge" /><meta name="viewport" content="width=device-width, initial-scale=1.0" /><title>选项卡</title><style>@import url(xxk.css);</style></head><body><!-- 创建选项卡模板 --><div class="xxk"><!-- 这个是选项卡导航 --><ul class="nav"><!-- 用 data-index自定义属性来对导航内容进行绑定 --><li class="active" data-index="1">省内</li><li data-index="2">国内</li><li data-index="3">国际</li></ul><!-- 选项卡导航里面的内容 --><!-- data-index="1"绑定省内 --><ul data-index="1" class="item active"><li><a href="">江西已连续408天无新增本地确诊病例...</a></li><li><a href="">参与人次破60万 江西全民国家安全知识答...</a></li><li><a href="">河北服毒自杀的货车司机今晨已下葬 此前...</a></li></ul><!-- data-index="2"绑定国内 --><ul data-index="2" class="item"><li><a href="">天津“十四五”将建百万亩设施农业</a></li><li><a href="">保护生物多样性 守住自然生态安全边界</a></li><li><a href="">强化现代农业科技和物质装备支撑</a></li></ul><!-- data-index="3"绑定国际 --><ul data-index="3" class="item"><li><a href="">伊朗原子能组织:纳坦兹核设施内部供电系统出现故障</a></li><li><a href="">日媒:福岛核电站4000个废弃物集装箱信息不明</a></li><li><a href="">美国黑人军官被两名白人警察拦下殴打 喷辣椒水</a></li></ul></div><script>//事件代理实现导航的切换,拿到导航和内容const nav = document.querySelector(".nav");const items = document.querySelectorAll(".item");//建立导航事件属性nav.onclick = (ev) => {// console.log(ev.currentTarget);// console.log(ev.target);// 1.清空之前的激活样式,并将导航设置激活状态//将导航用数组来遍历[...nav.children].forEach((item) => item.classList.remove("active"));ev.target.classList.add("active");// //2.根据data-index来确定应该将那个列表进行激活和绑定items.forEach((item) => item.classList.remove("active"));[...items].filter((item) => item.dataset.index === ev.target.dataset.index).pop(0).classList.add("active");};</script></body></html>
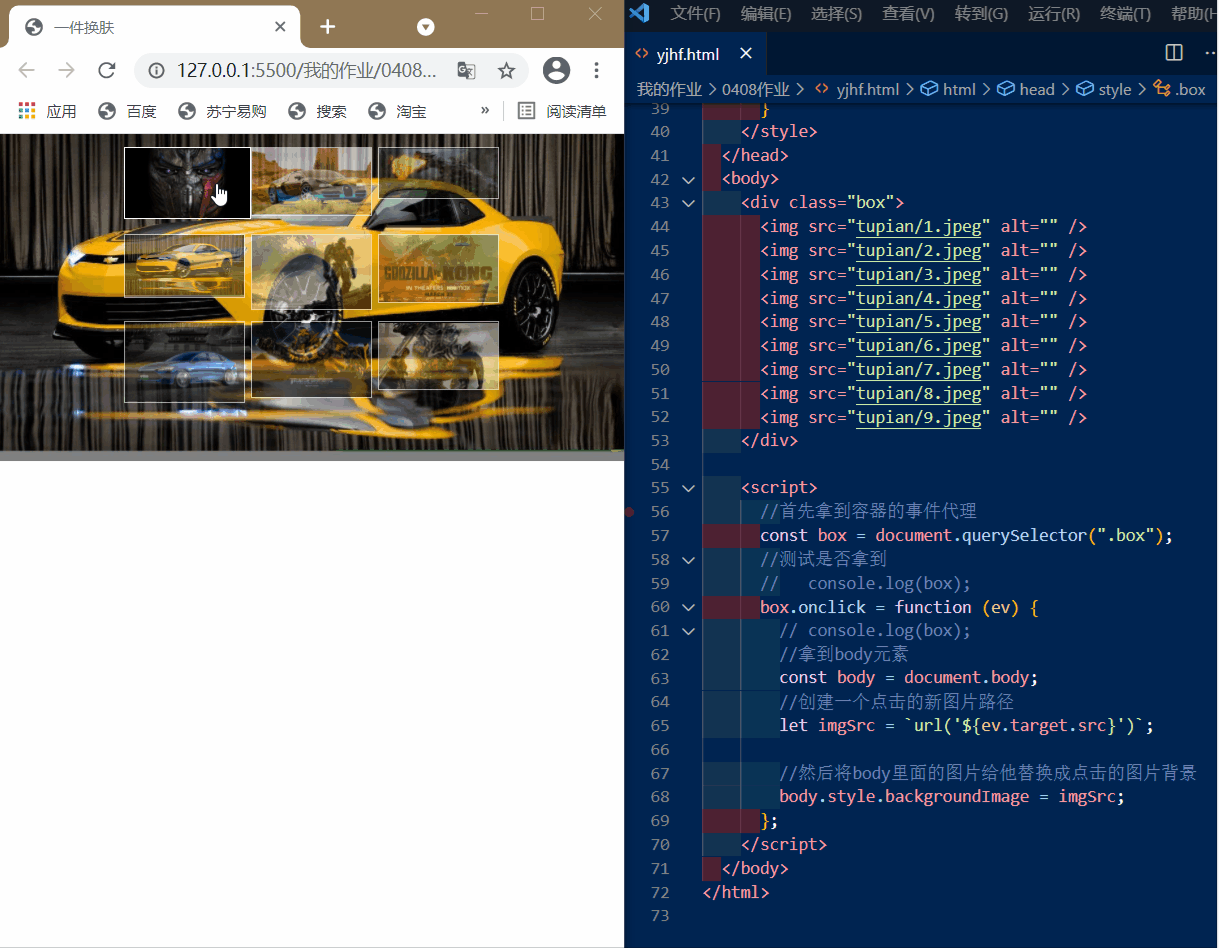
四.换肤案例
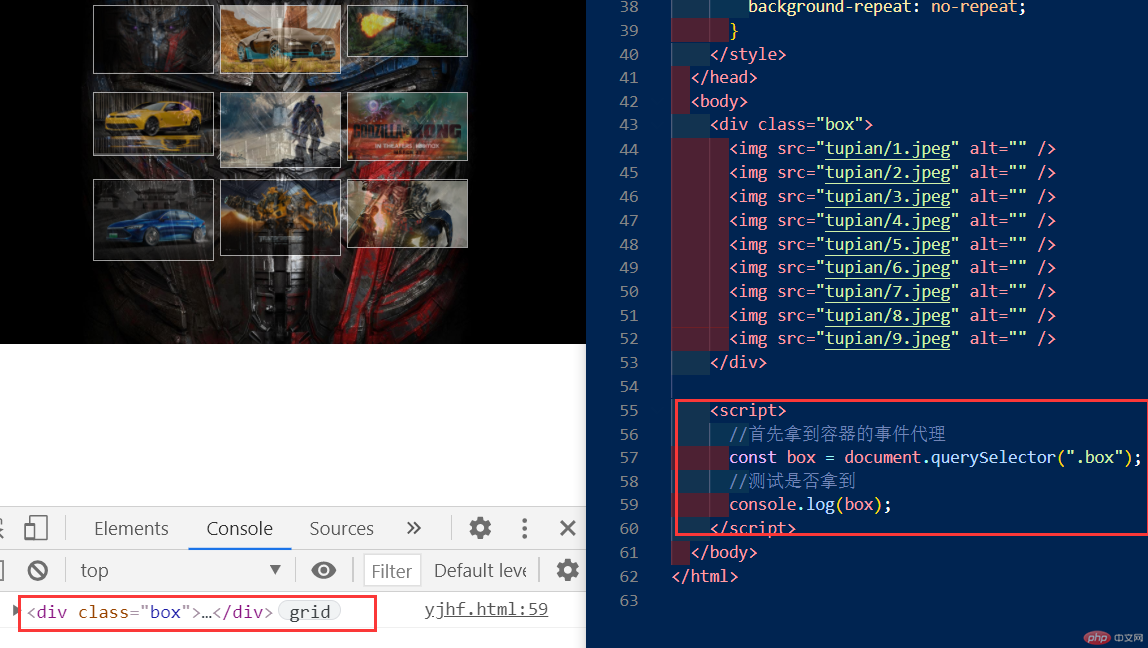
测试已拿到容器元素,下面我们来给它添加事件属性
代码块
<!DOCTYPE html><html lang="en"><head><meta charset="UTF-8" /><meta http-equiv="X-UA-Compatible" content="IE=edge" /><meta name="viewport" content="width=device-width, initial-scale=1.0" /><title>一件换肤</title><style>* {padding: 0;margin: 0;box-sizing: border-box;}.box {width: 300px;display: grid;grid-template-columns: repeat(3, 1fr);grid-template-rows: repeat(3, 1fr);gap: 5px;margin: 10px auto;}.box > img {width: 100%;border: 1px solid white;opacity: 0.6;}.box > img:active {opacity: 1;}.box > img:hover {opacity: 1;cursor: pointer;width: 105%;}body {background-image: url(tupian/1.jpeg);background-size: cover;background-repeat: no-repeat;}</style></head><body><div class="box"><img src="tupian/1.jpeg" alt="" /><img src="tupian/2.jpeg" alt="" /><img src="tupian/3.jpeg" alt="" /><img src="tupian/4.jpeg" alt="" /><img src="tupian/5.jpeg" alt="" /><img src="tupian/6.jpeg" alt="" /><img src="tupian/7.jpeg" alt="" /><img src="tupian/8.jpeg" alt="" /><img src="tupian/9.jpeg" alt="" /></div><script>//首先拿到容器的事件代理const box = document.querySelector(".box");//测试是否拿到// console.log(box);box.onclick = function (ev) {// console.log(box);//拿到body元素const body = document.body;//创建一个点击的新图片路径let imgSrc = `url('${ev.target.src}')`;//然后将body里面的图片给他替换成点击的图片背景body.style.backgroundImage = imgSrc;};</script></body></html>